Smart Listing
Introduction
Starting your app journey with a few subscriptions and consumables for all customers is simple: just create a basic IAPHUB listing. But what if you need to offer different products tailored to individual users? How can you achieve that level of customization?
Enter our Smart Listing feature. With this tool, you can configure a listing that dynamically presents various products based on the user.
To fully grasp this guide, let's delve into three key terms you'll encounter frequently:
- Listing: This is what we configure in the editor to inform IAPHUB about the products available for sale.
- Store: A store encapsulates a list of products. While a basic listing contains only one store, a smart listing can have multiple stores. Depending on our setup, IAPHUB determines which store to present to the user.
- Group: Groups organize stores, making it easier to manage your listing, especially when dealing with a large number of stores.
Enable smart listing editor
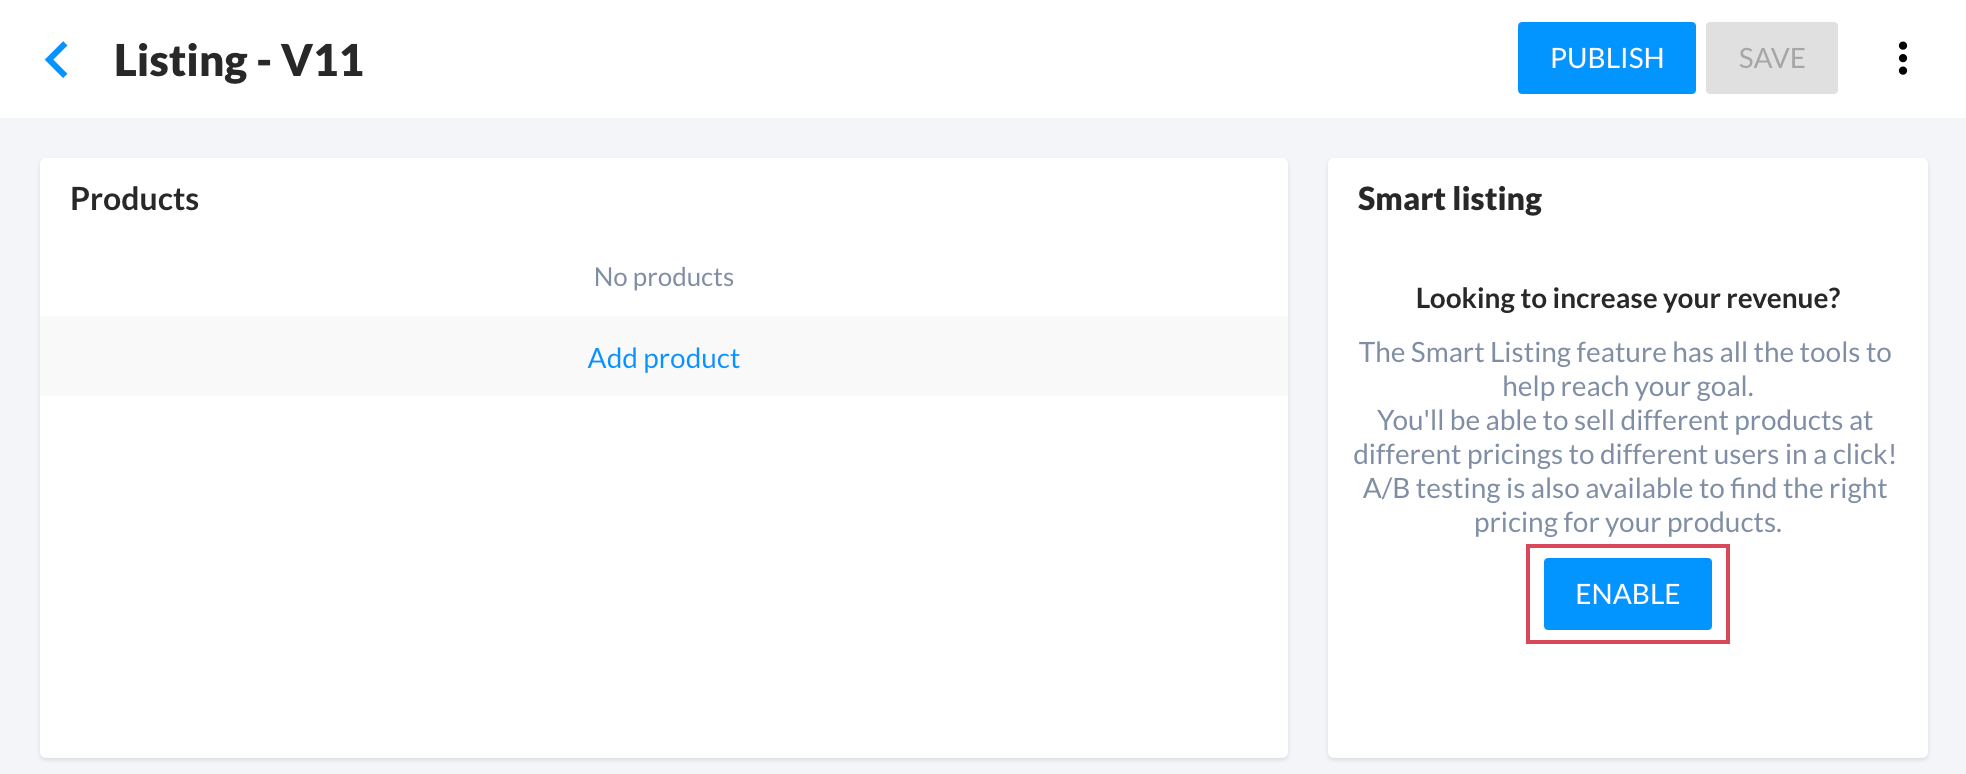
Let's create a smart listing to demonstrate exactly how it works. By default, a listing is basic, meaning it returns the same products for everyone.
But fear not! With the Smart Listing feature, you can tailor product offerings to individual users. To activate the Smart Listing Editor, simply click on the Enable button on your latest listing (refer to the screenshot below).
Getting started with the smart listing editor
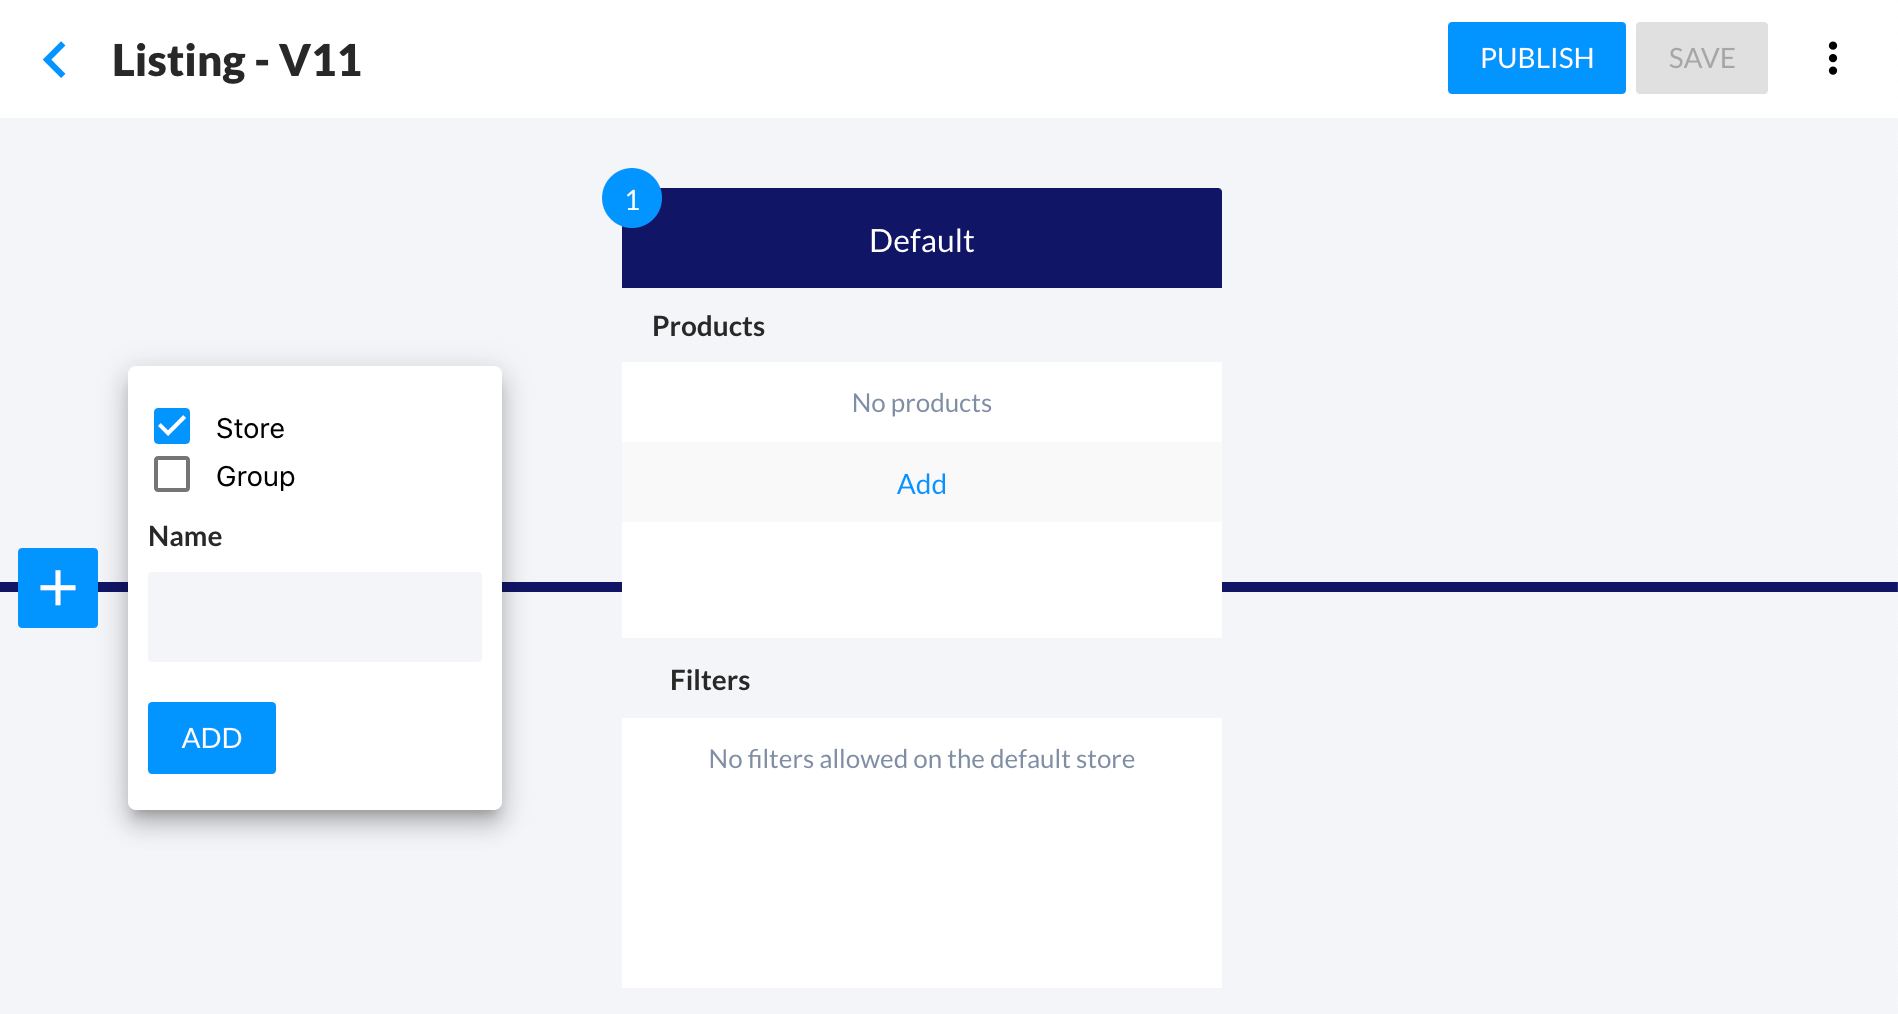
Once you've enabled the Smart Listing Editor, you'll notice two key elements (refer to the screenshot below):
- Default Store: This is the primary store selected by default if no other store is chosen. Having a smart listing with only one default store is essentially the same as having a basic listing. That's why no filter is allowed on the default store.
- '+' Button: Clicking on this button grants you the ability to create either a new store or a group.
Now, let's consider an example scenario: currently, we're offering 10 credits for $1.99 (Tier 2). However, we aim to provide an alternative pricing option of 10 credits for $0.99 (Tier 1), based on specific conditions.
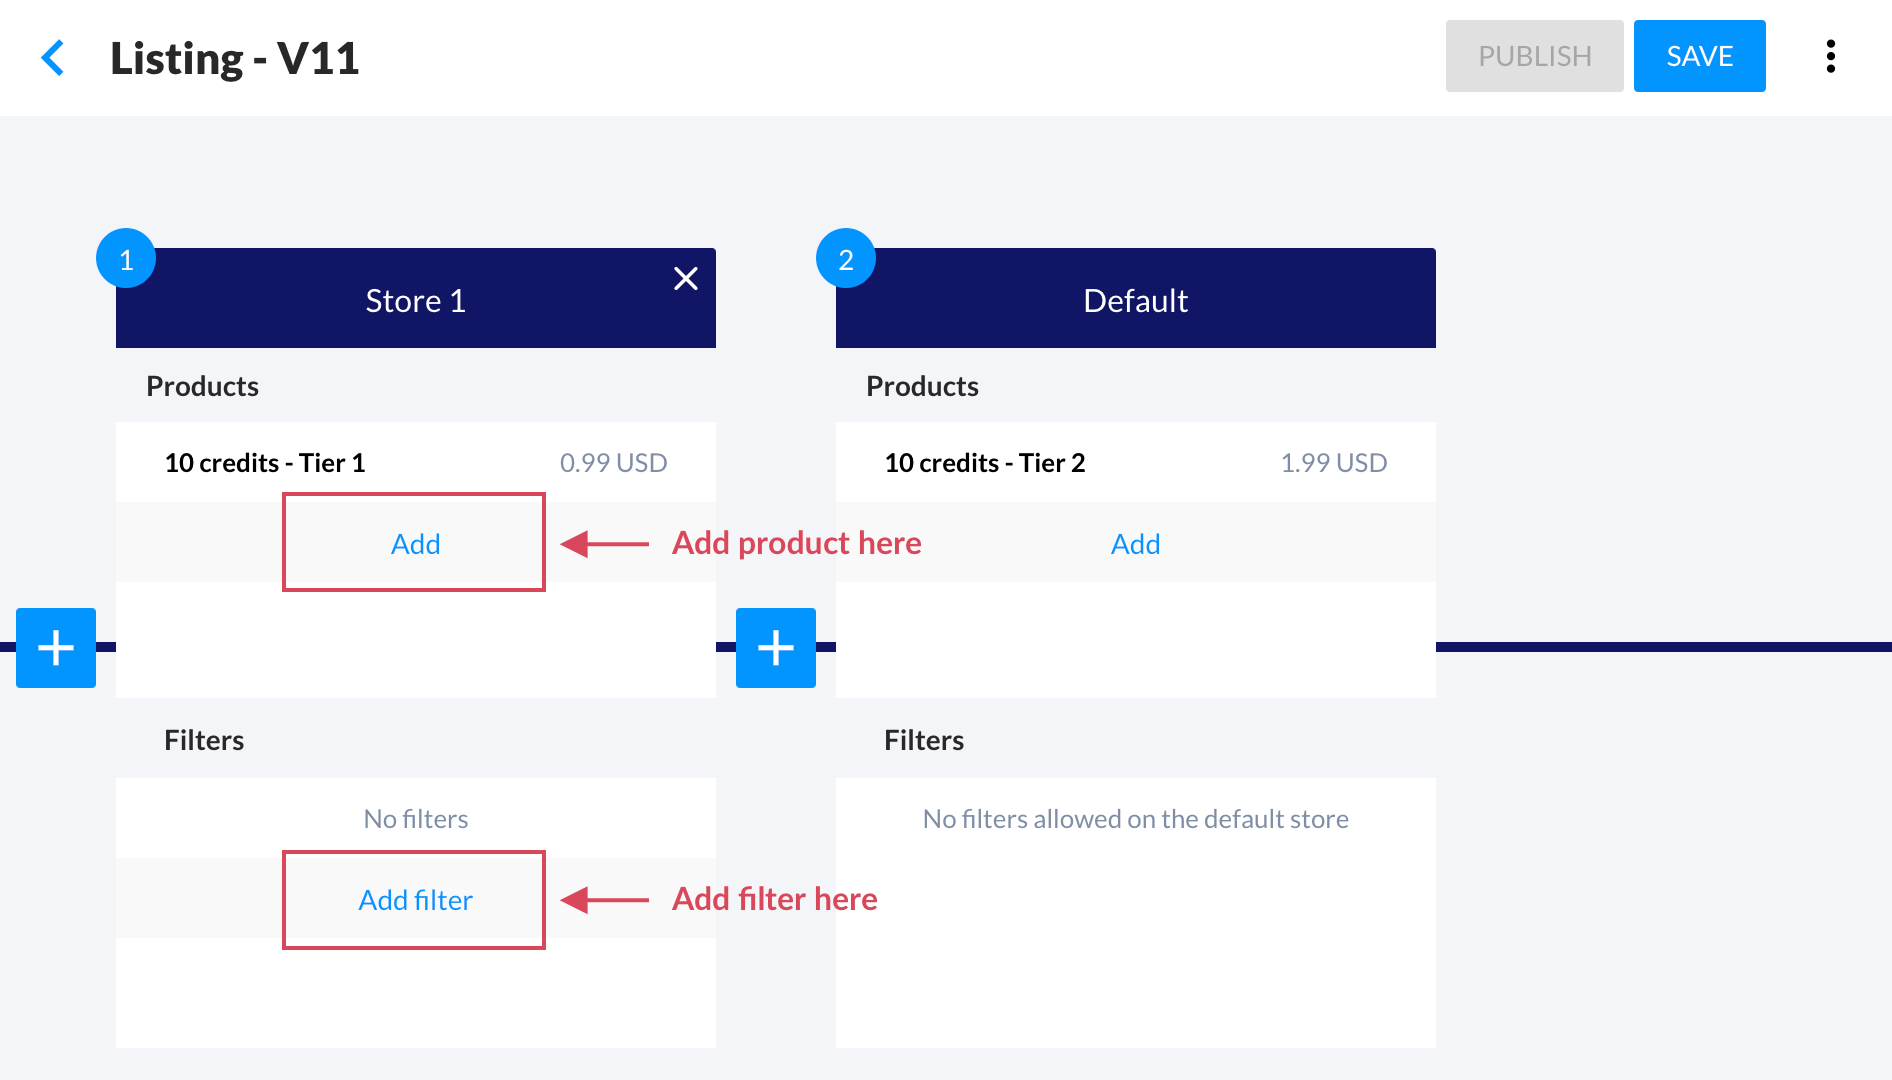
To inform IAPHUB that we're only returning Store 1 for select users, we need to add a filter. Simply click on the 'Add filter' link, and a modal will appear.
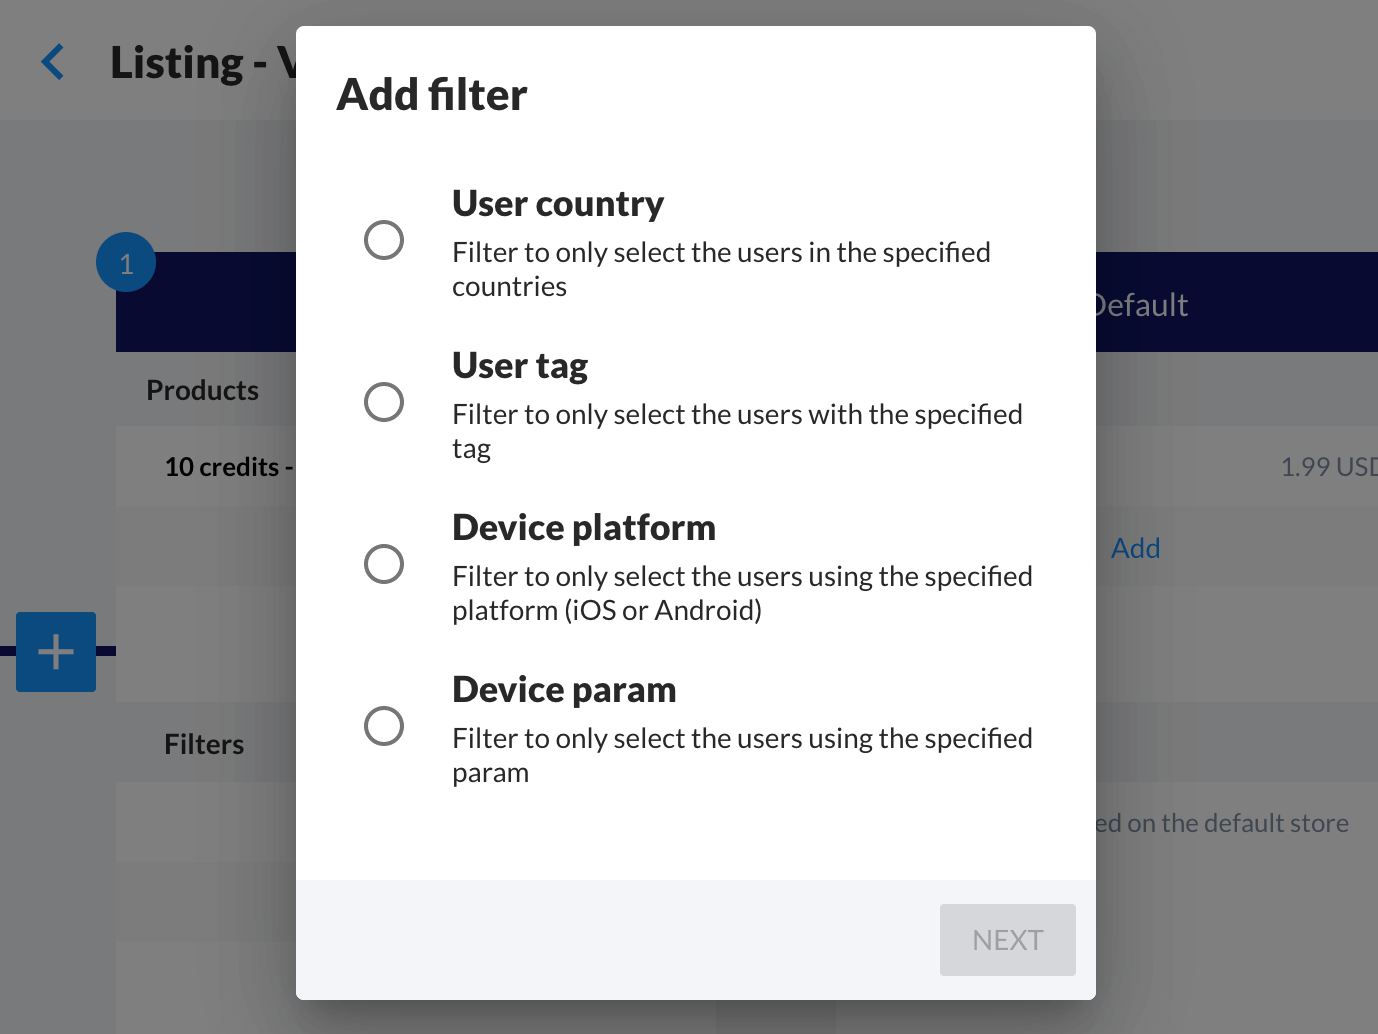
As you can see, there are several types of filters available:
User country
Using this filter, the store will be selected only if the user is from one of the specified countries. IAPHUB automatically detects the user's country from their IP address.
User id
With this filter, the store will be selected only if the user match the specified user ID.
User tag
With this filter, the store will be selected only if the user has the specified tag. This filter offers great flexibility, as you can add tags to users easily from the client or server using our API.
Device platform
This filter selects the store only if the user is using the specified platform. For example, you could use this filter to return a store exclusively on iOS.
Start date
This filter selects the earliest date from which availability begins.
End date
This filter selects the latest date until which availability ends
Device param
You can specify certain parameters from the device to provide to IAPHUB when the client fetches the products for sale using the setDeviceParams method.
With this filter, the store will only be selected if the device has the specified parameter. Unlike the user tag, which is saved at the user level, a device param comes directly from the device. For example, if you want to offer a store for a specific version of your app, you can't rely on a user tag because a user may have multiple devices with different app versions. In such cases, you would utilize a device param.
Below is an example demonstrating how we return our cheapest 10-credit product based on specific conditions:
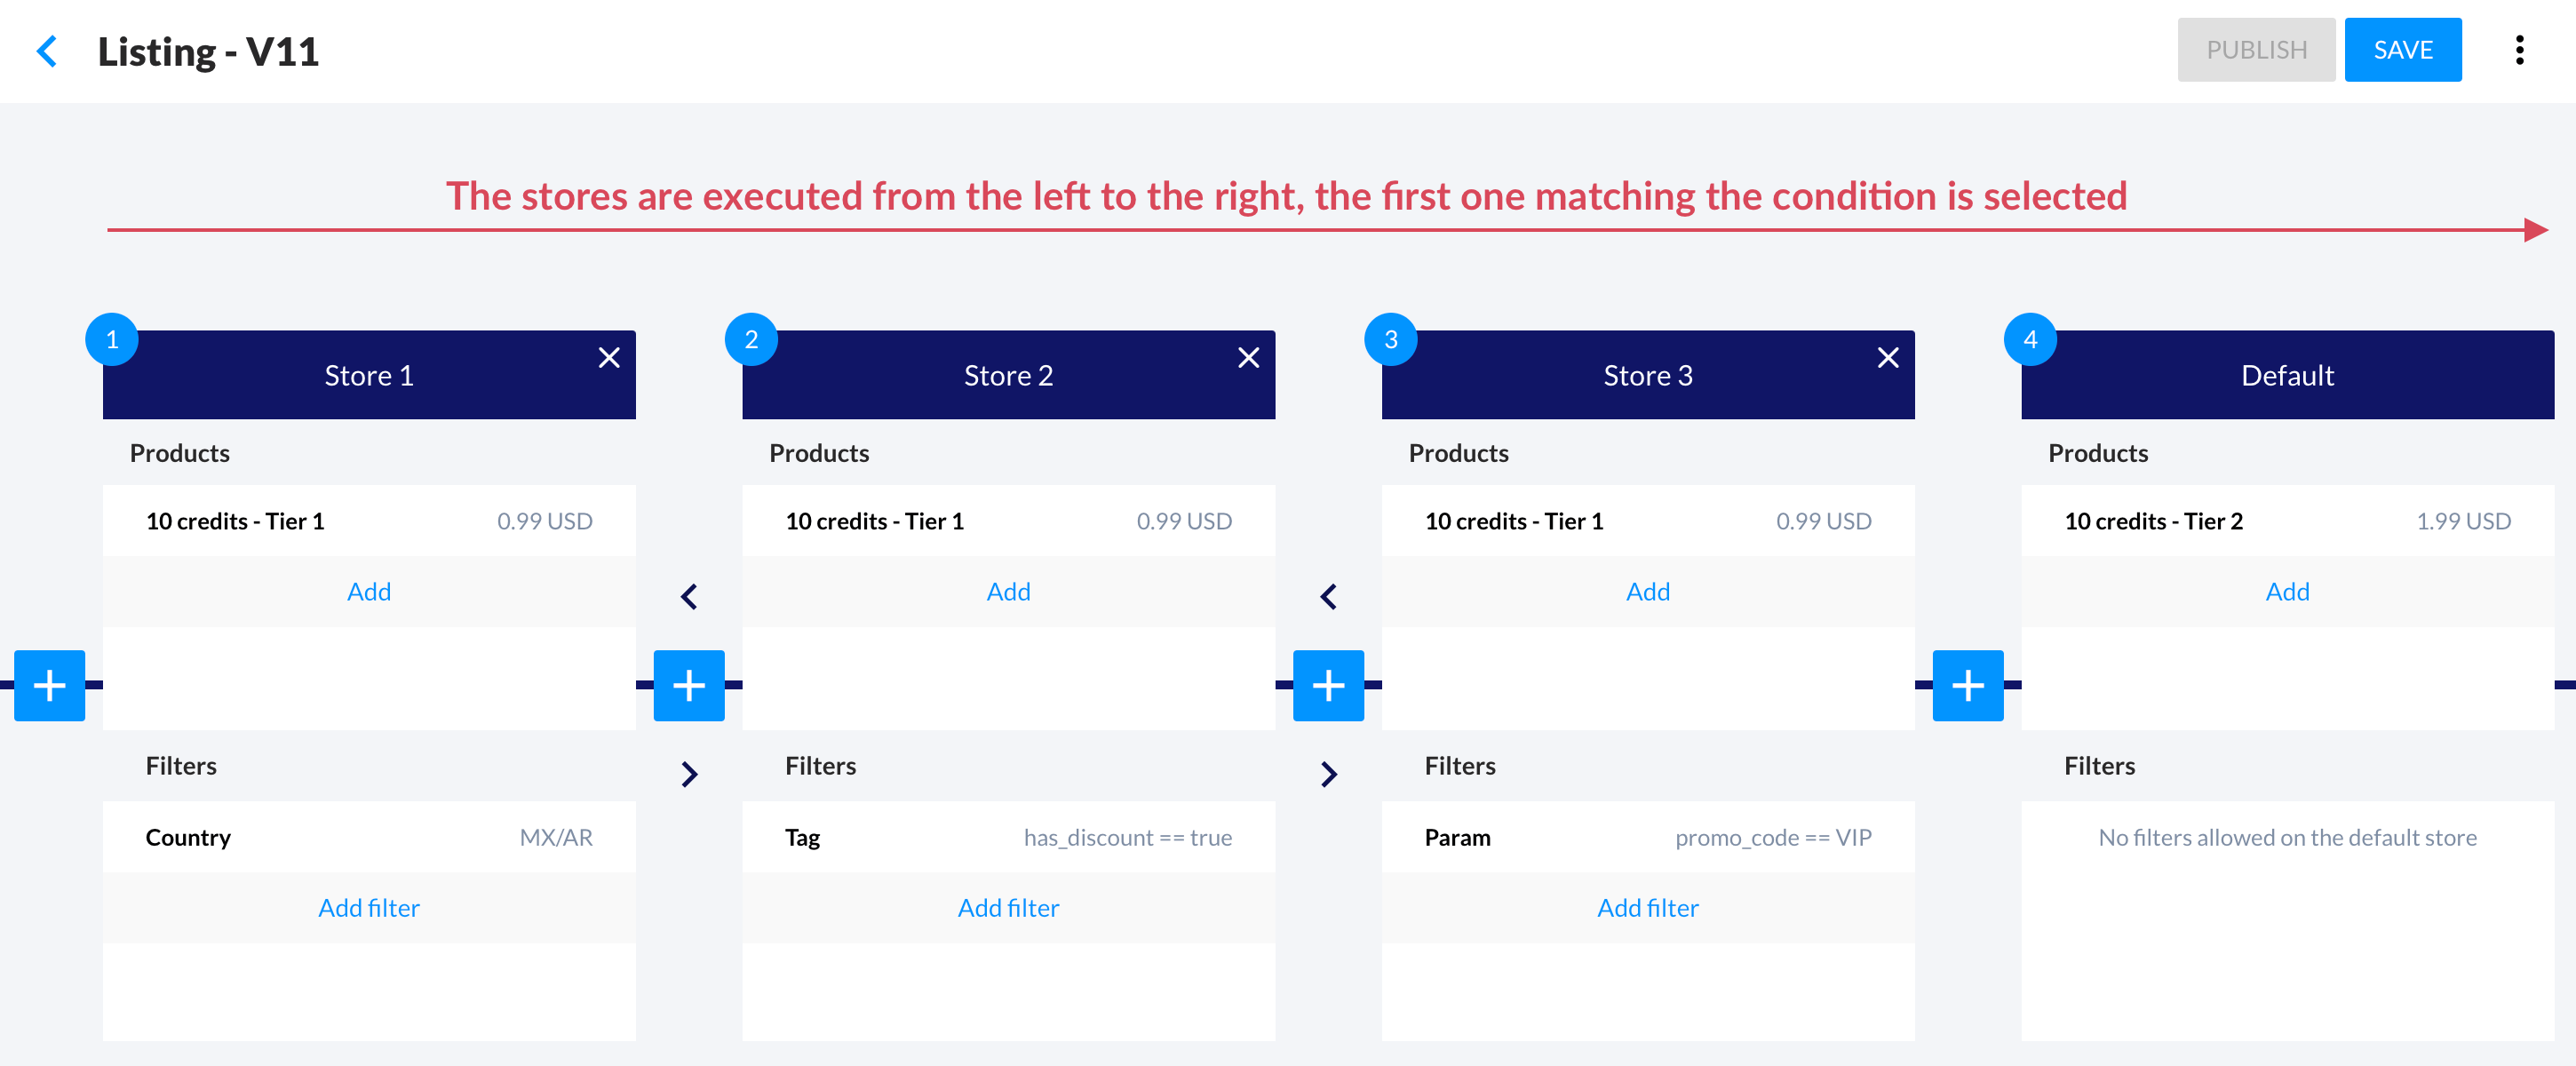
It's crucial to understand that stores are executed from left to right. Here's exactly how it works:
- Store 1 is executed: the system checks if the user is from Argentina or Mexico. If so, the store is returned.
- Store 2 is executed: the system checks if the user has a tag 'has_discount' set to 'true'. If so, the store is returned.
- Store 3 is executed: the system checks if a device parameter 'promo_code' with a value of 'VIP' has been provided. If so, the store is returned.
- If none of the previous stores match, the default store is returned.
This example is straightforward, but it demonstrates the versatility of a smart listing. With this feature, you can customize your listing to suit almost any requirement!
Groups
Another intriguing feature you might find useful, especially as your listing becomes more complex with numerous stores, is the use of groups!
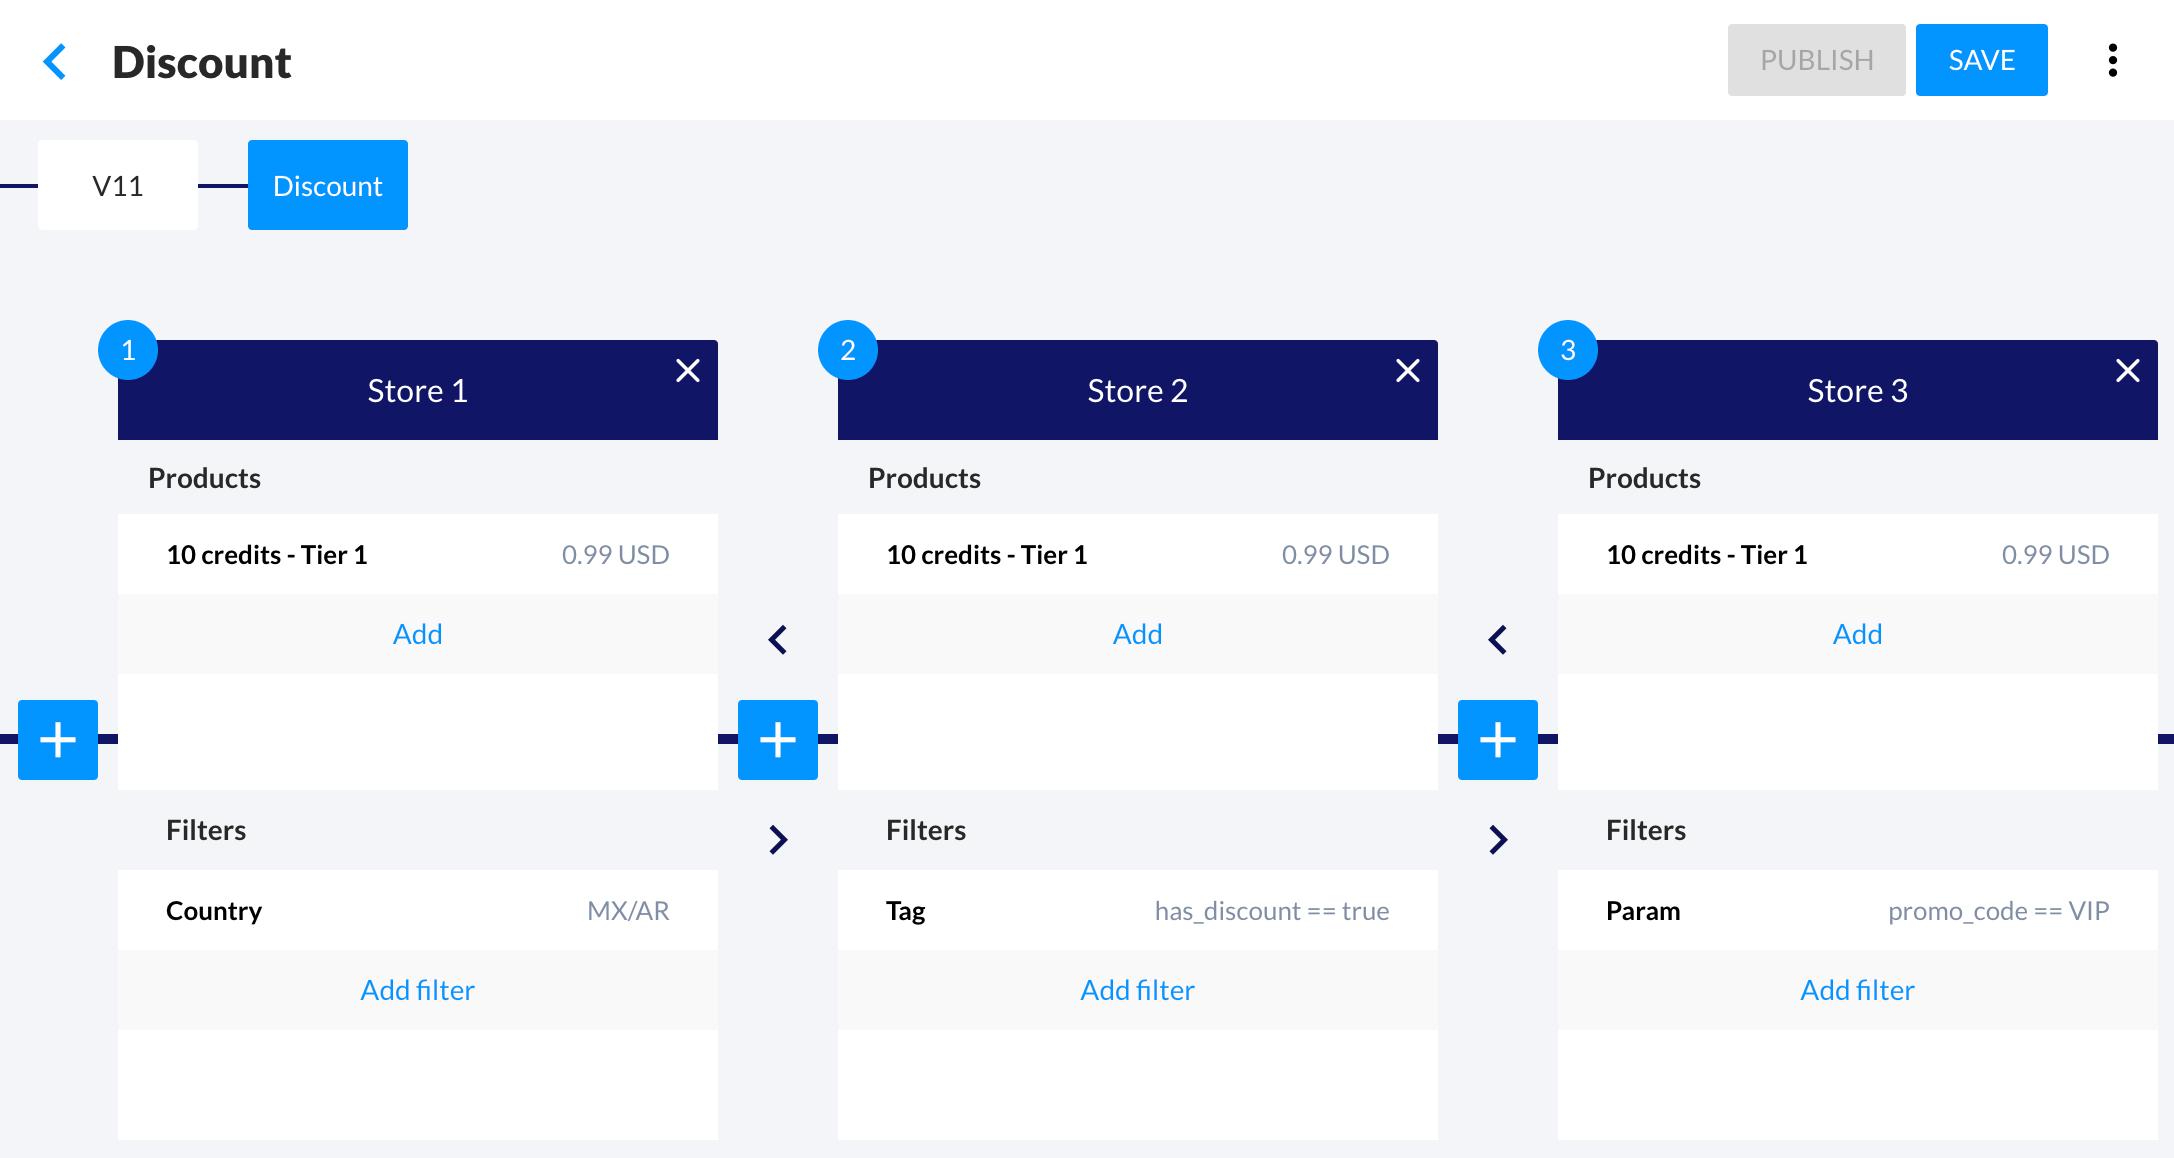
You may recall that when we clicked on the '+' button, we had two options. Let's explore the second option and create a group called 'Discount.' This group will encompass our three stores, each returning discounted products.

It does seem a bit cleaner, doesn't it? Now, what happens here? Initially, all the stores within the 'Discount' group will be executed. If none of them match the criteria, the default store will be selected.
Additionally, you can apply filters to a group, functioning similarly to a store. Clicking on the group allows you to navigate inside.
A/B Testing
A/B testing is a method of comparing two lists of products to determine which performs better in achieving a specific goal, such as increasing sales or improving user engagement. The two versions, A and B, are presented to randomly selected groups of users, and their behavior is measured and compared to determine which list is more effective.
To set up A/B testing on IAPHUB, follow these steps:
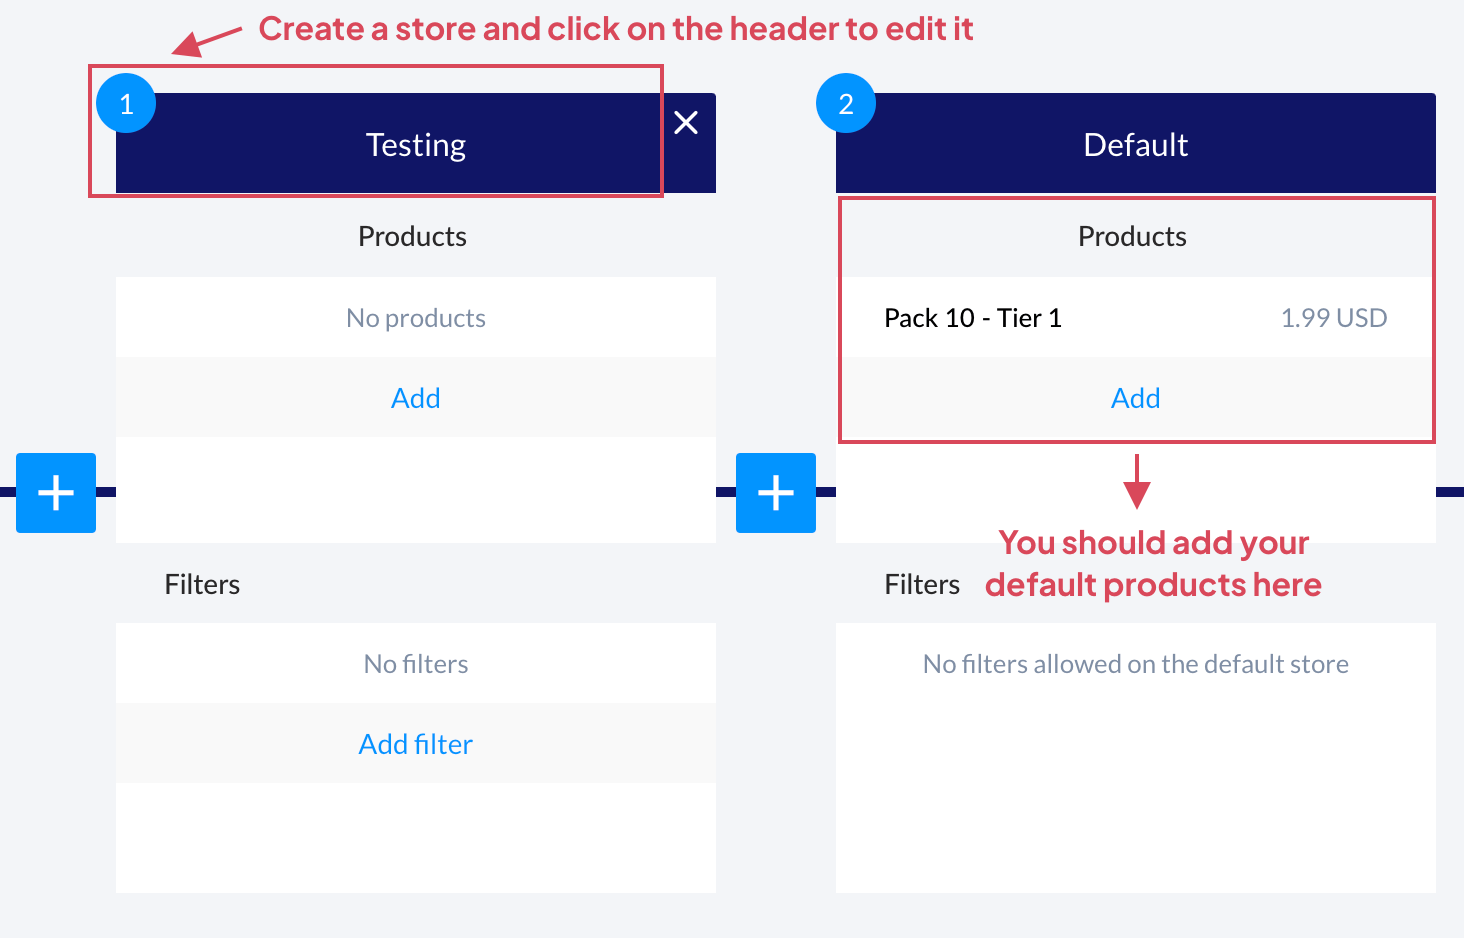
- Add your default products to the "Default" store.
- Create a new store (let's call it "Testing").
- Click on the header of the new store to edit the settings.
When editing the store page, make the following adjustments:
- Change the store type to "testing".
- Adjust the "probability," which represents the percentage of users involved in the test.
- Set the number of segments, typically 2 (A and B).
- Add the products for each segment.
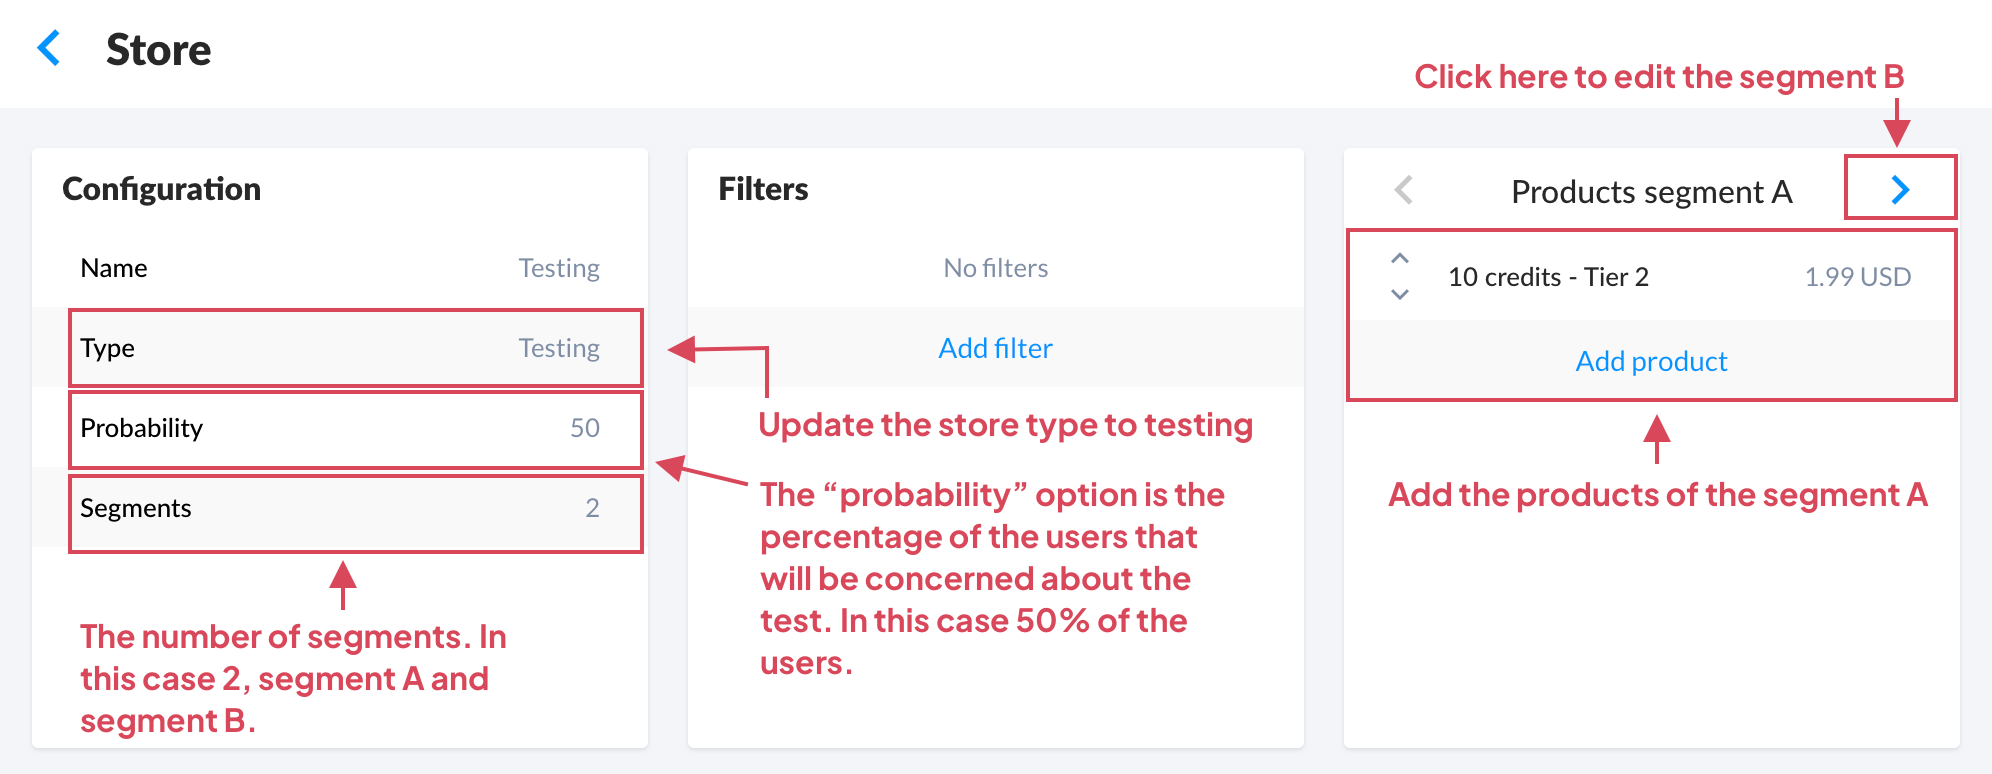
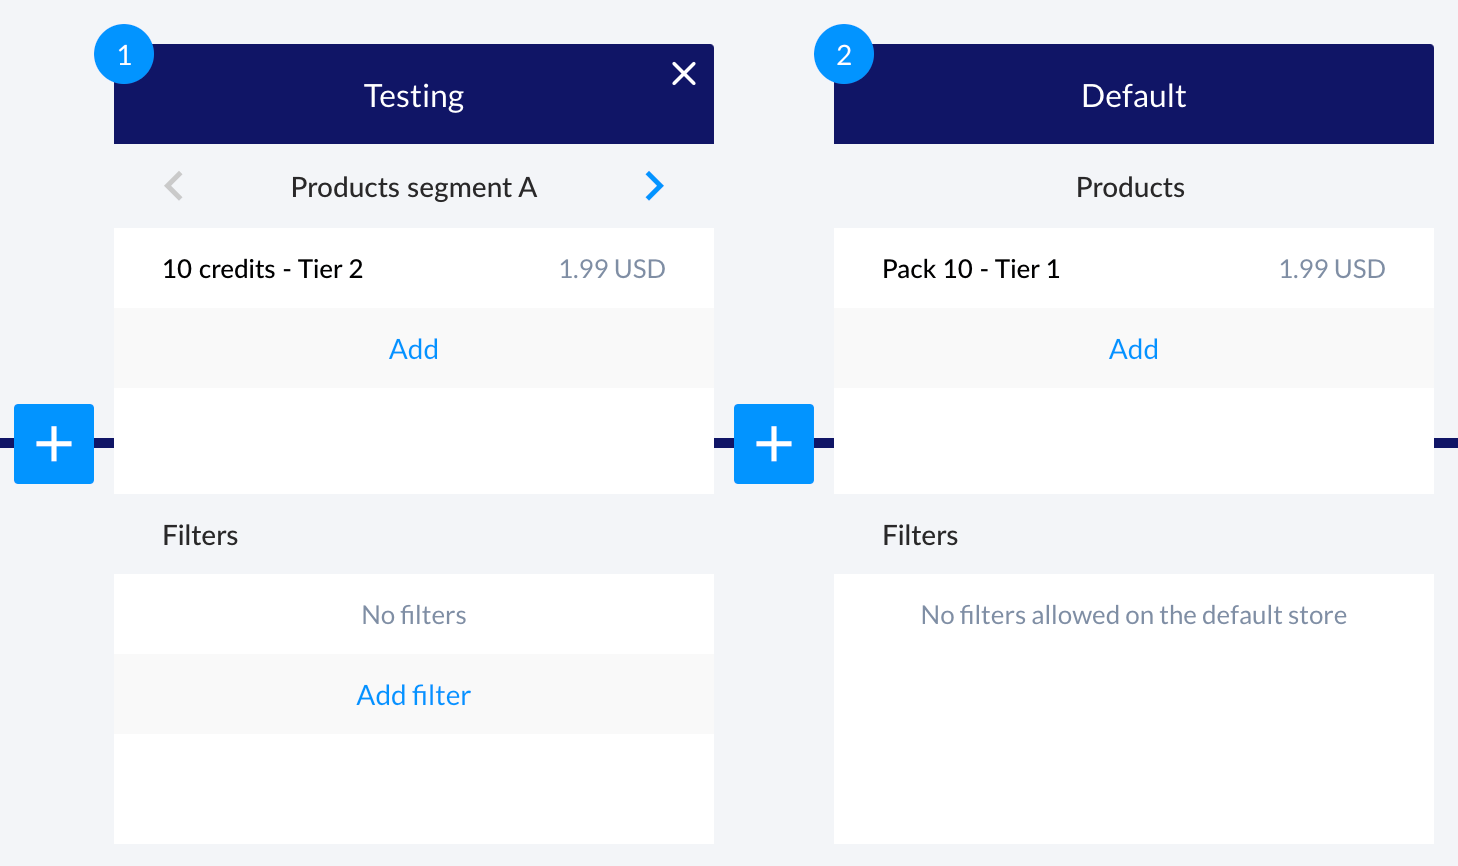
In the example below, we've set up an A/B test featuring two products: "10 credits Tier 1" and "10 credits Tier 2".
This test will be displayed to 50% of our users, while the remaining users will see products from the default store.
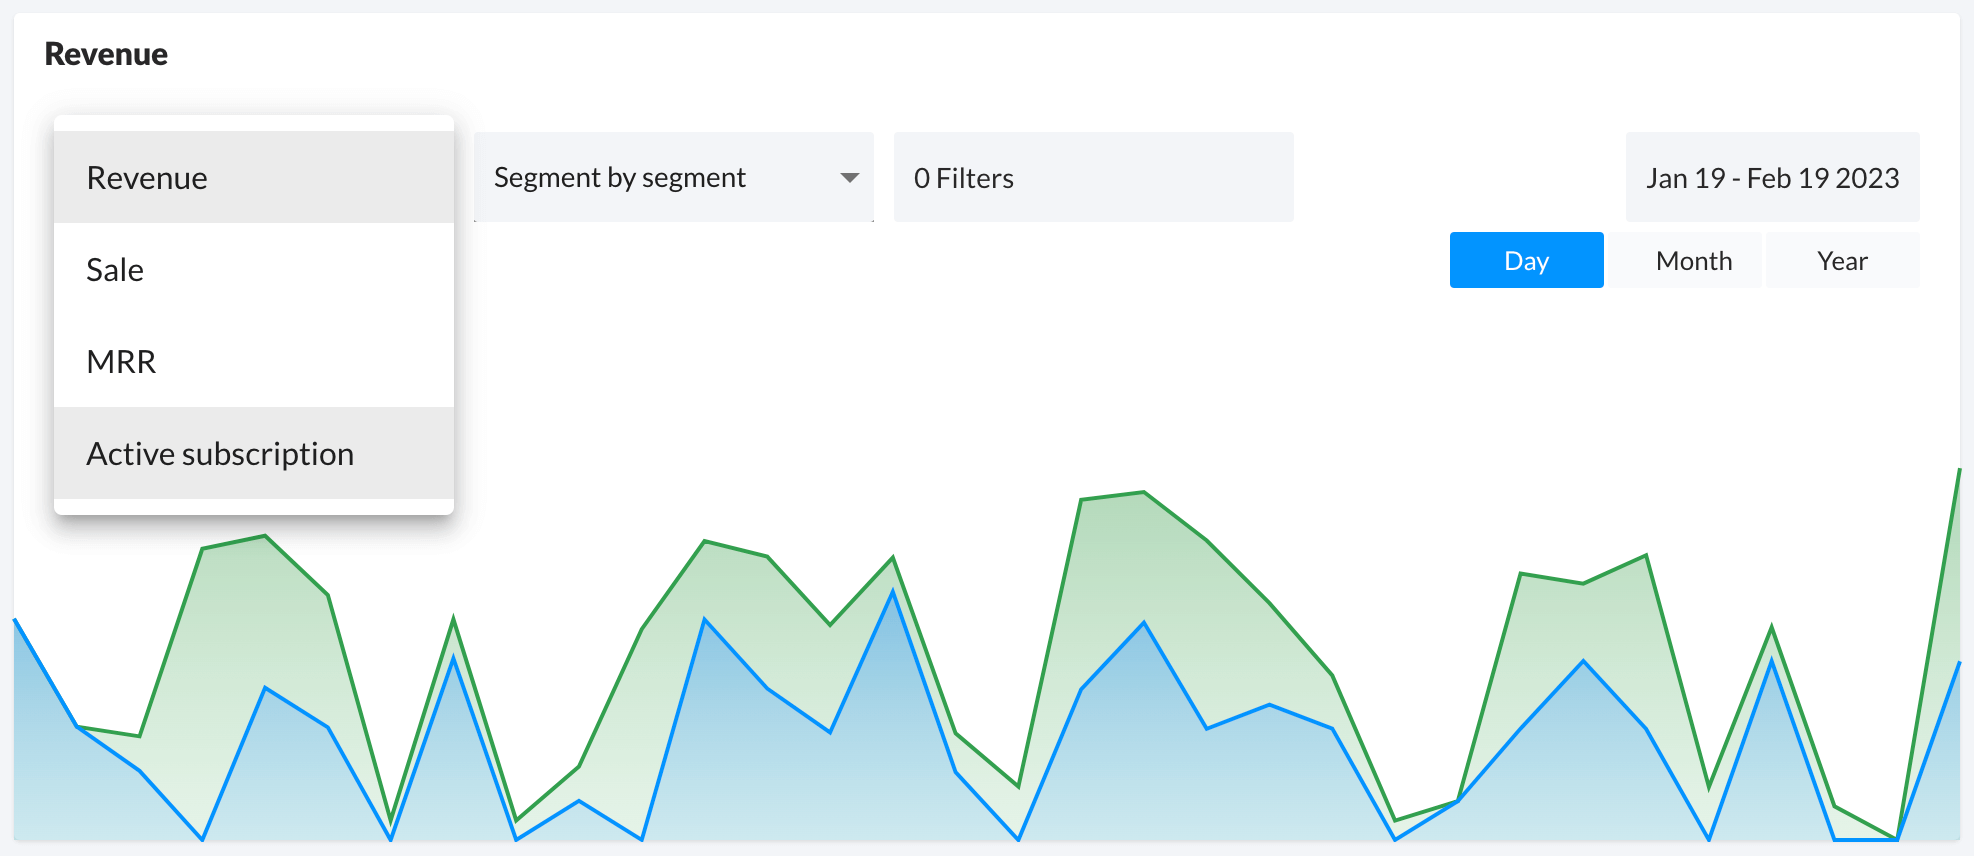
Once your new listing has been published, you can access analytics for your "Testing" store by clicking on its name. Here, you'll find valuable metrics including revenue, MRR (monthly recurring revenue), and active subscriptions. Analyzing these metrics will empower you to determine which segment performs best.
Emulate
If you have a complex listing, testing it can be a smart move.
Thankfully, you can emulate a listing directly from the IAPHUB dashboard!
To do so, simply click on the 'three dots' icon located next to the 'Publish' and 'Save' buttons.
A menu will appear; then, click on 'Emulate', and a modal will pop up.
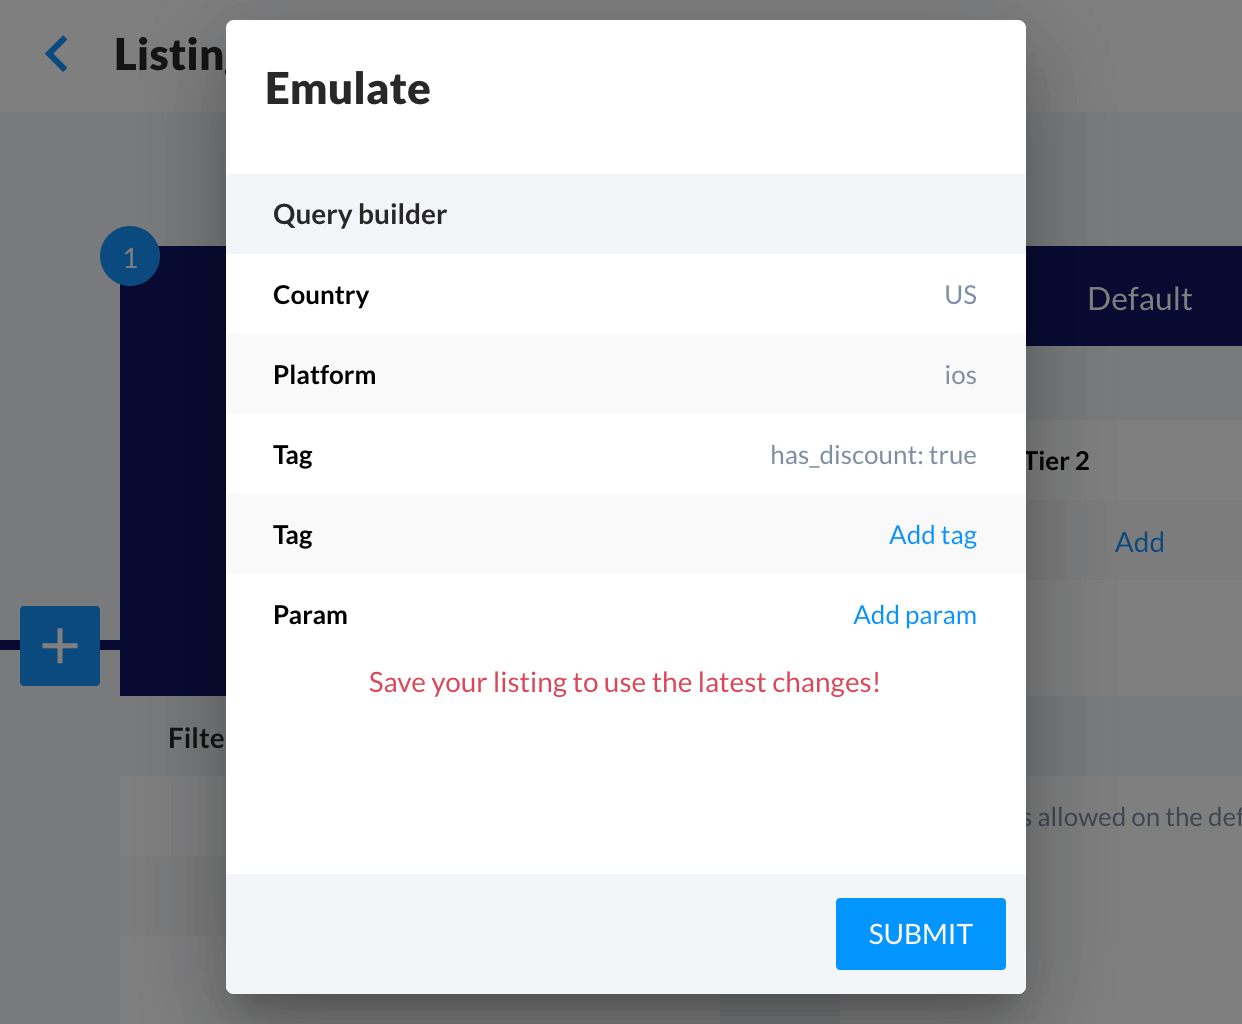
From this modal, you can simulate various user parameters. After submitting the form, you'll be able to see which store has been selected.