Configure Server Notifications
Configure the Google real-time developer notifications to ensure that IAPHUB receives an event when there is a change in subscription status.
note
Configuring server notifications isn't required but highly recommended, doing so will speed up the sync between Google and IAPHUB.
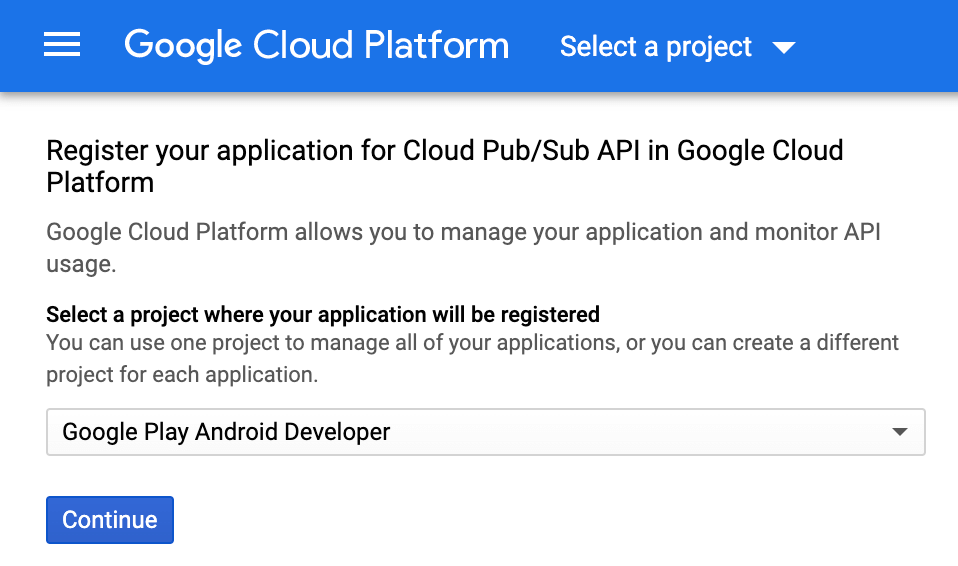
1. Enable Google Cloud Pub/Sub for your project here
2. Go to the Pub/Sub topics page in the Cloud Console
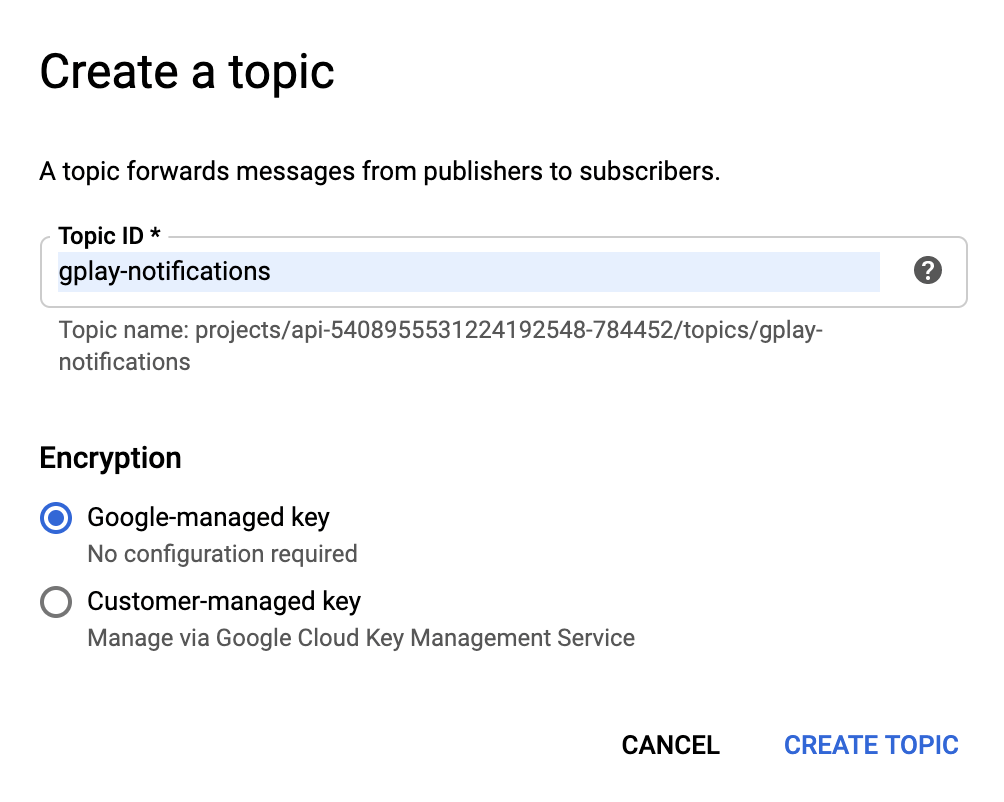
3. Click on CREATE TOPIC

4. Create a topic gplay-notifications
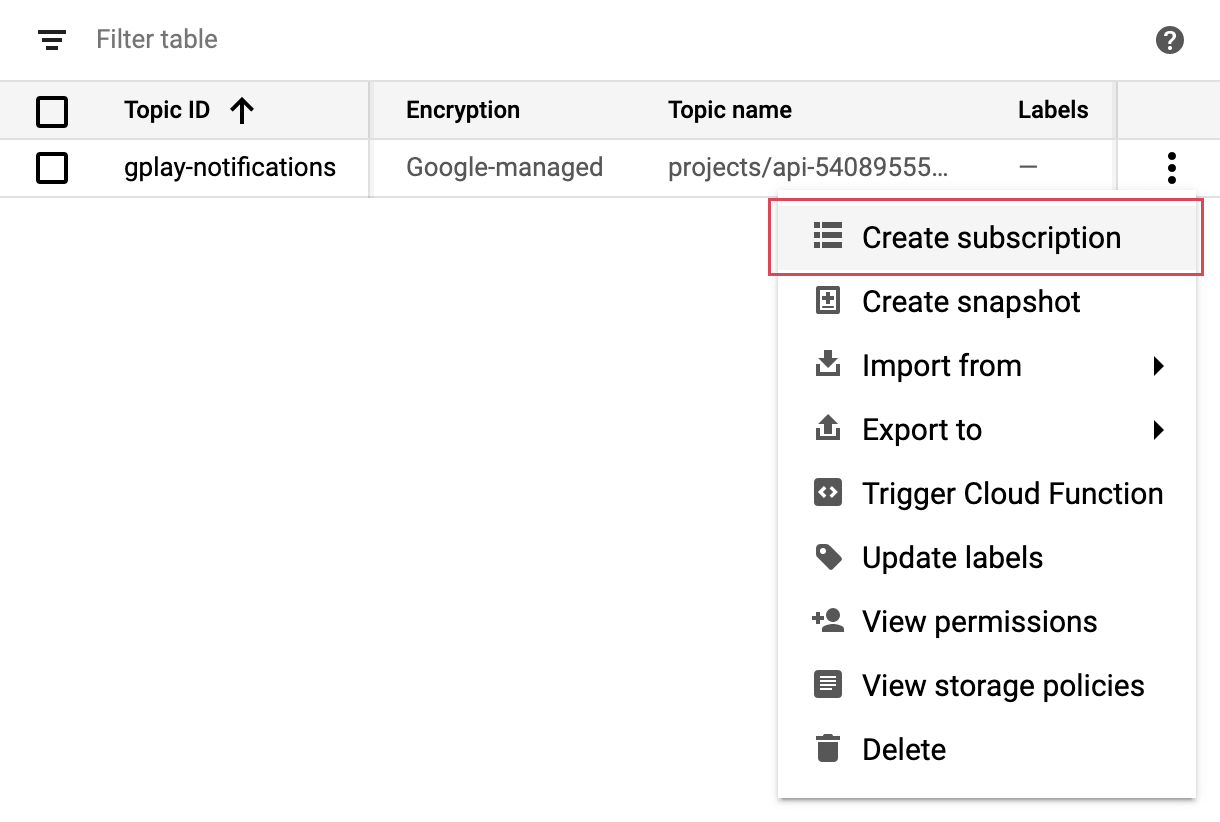
5. Display the menu for the topic you just created, and click on Create subscription
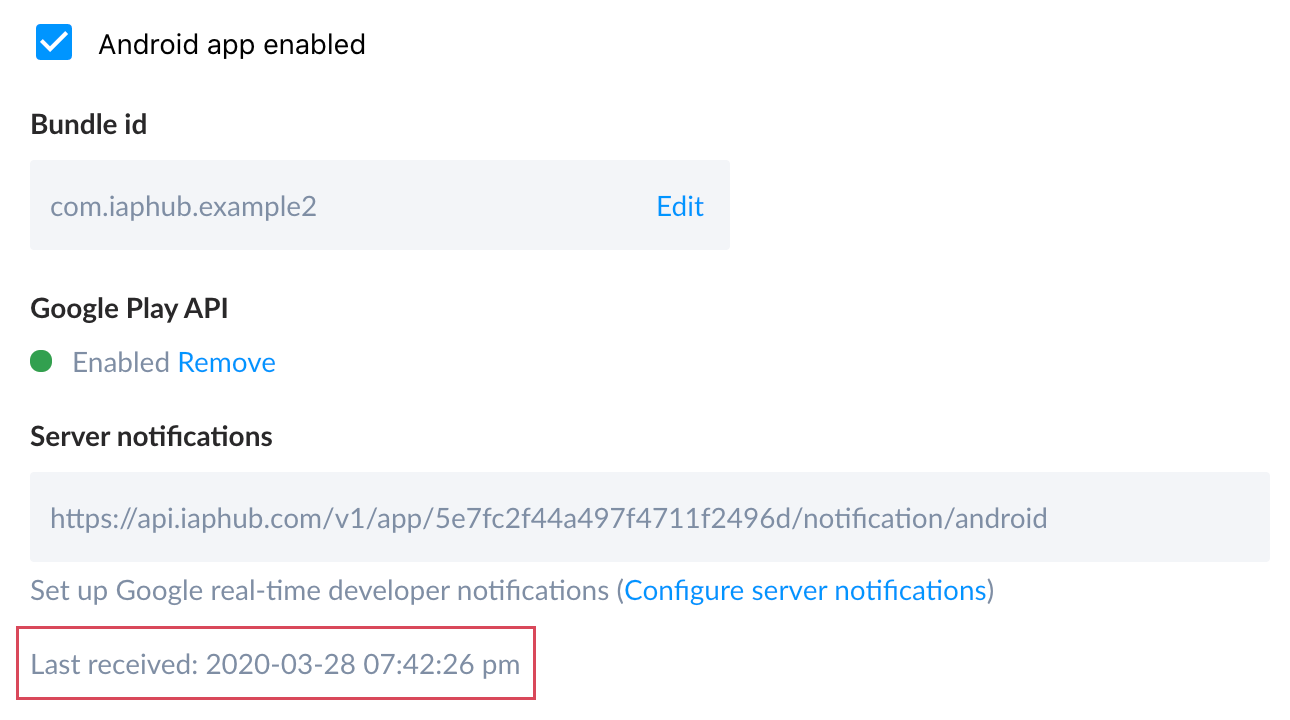
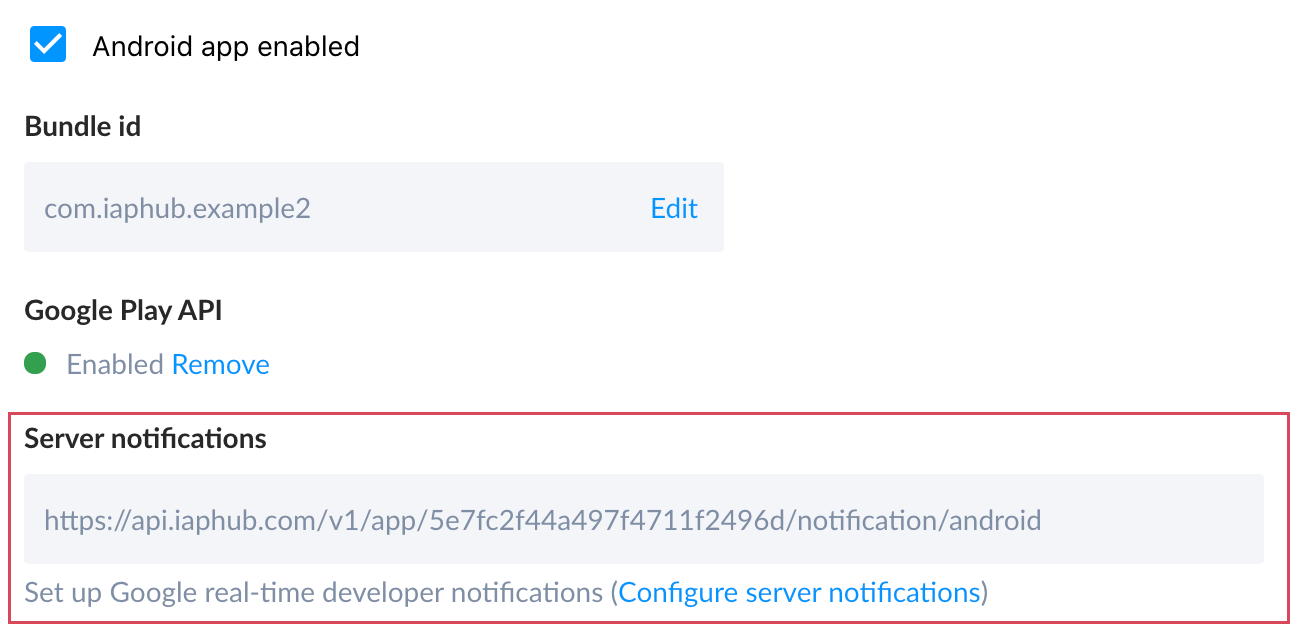
6. Go to the settings page of the IAPHUB dashboard, click on the "Android" section and copy the server notifications url
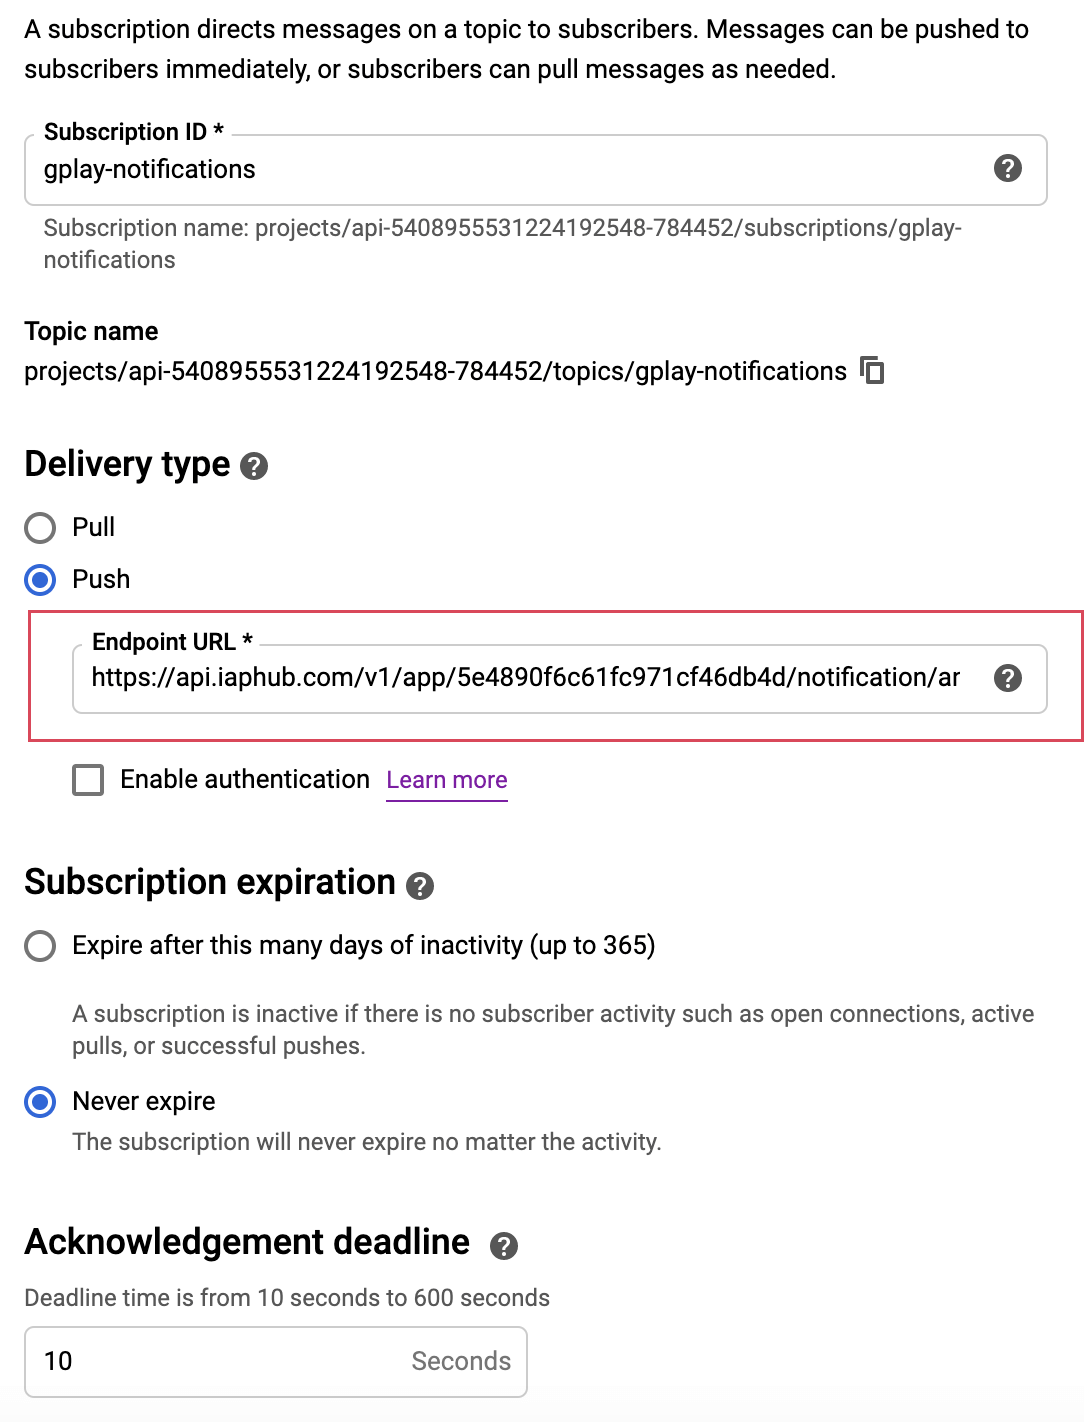
7. Select "Push" delivery type, enter the url of the previous screen and create the subscription
8. Go to the Pub/Sub topics page and edit the permissions of the topic you've previously created
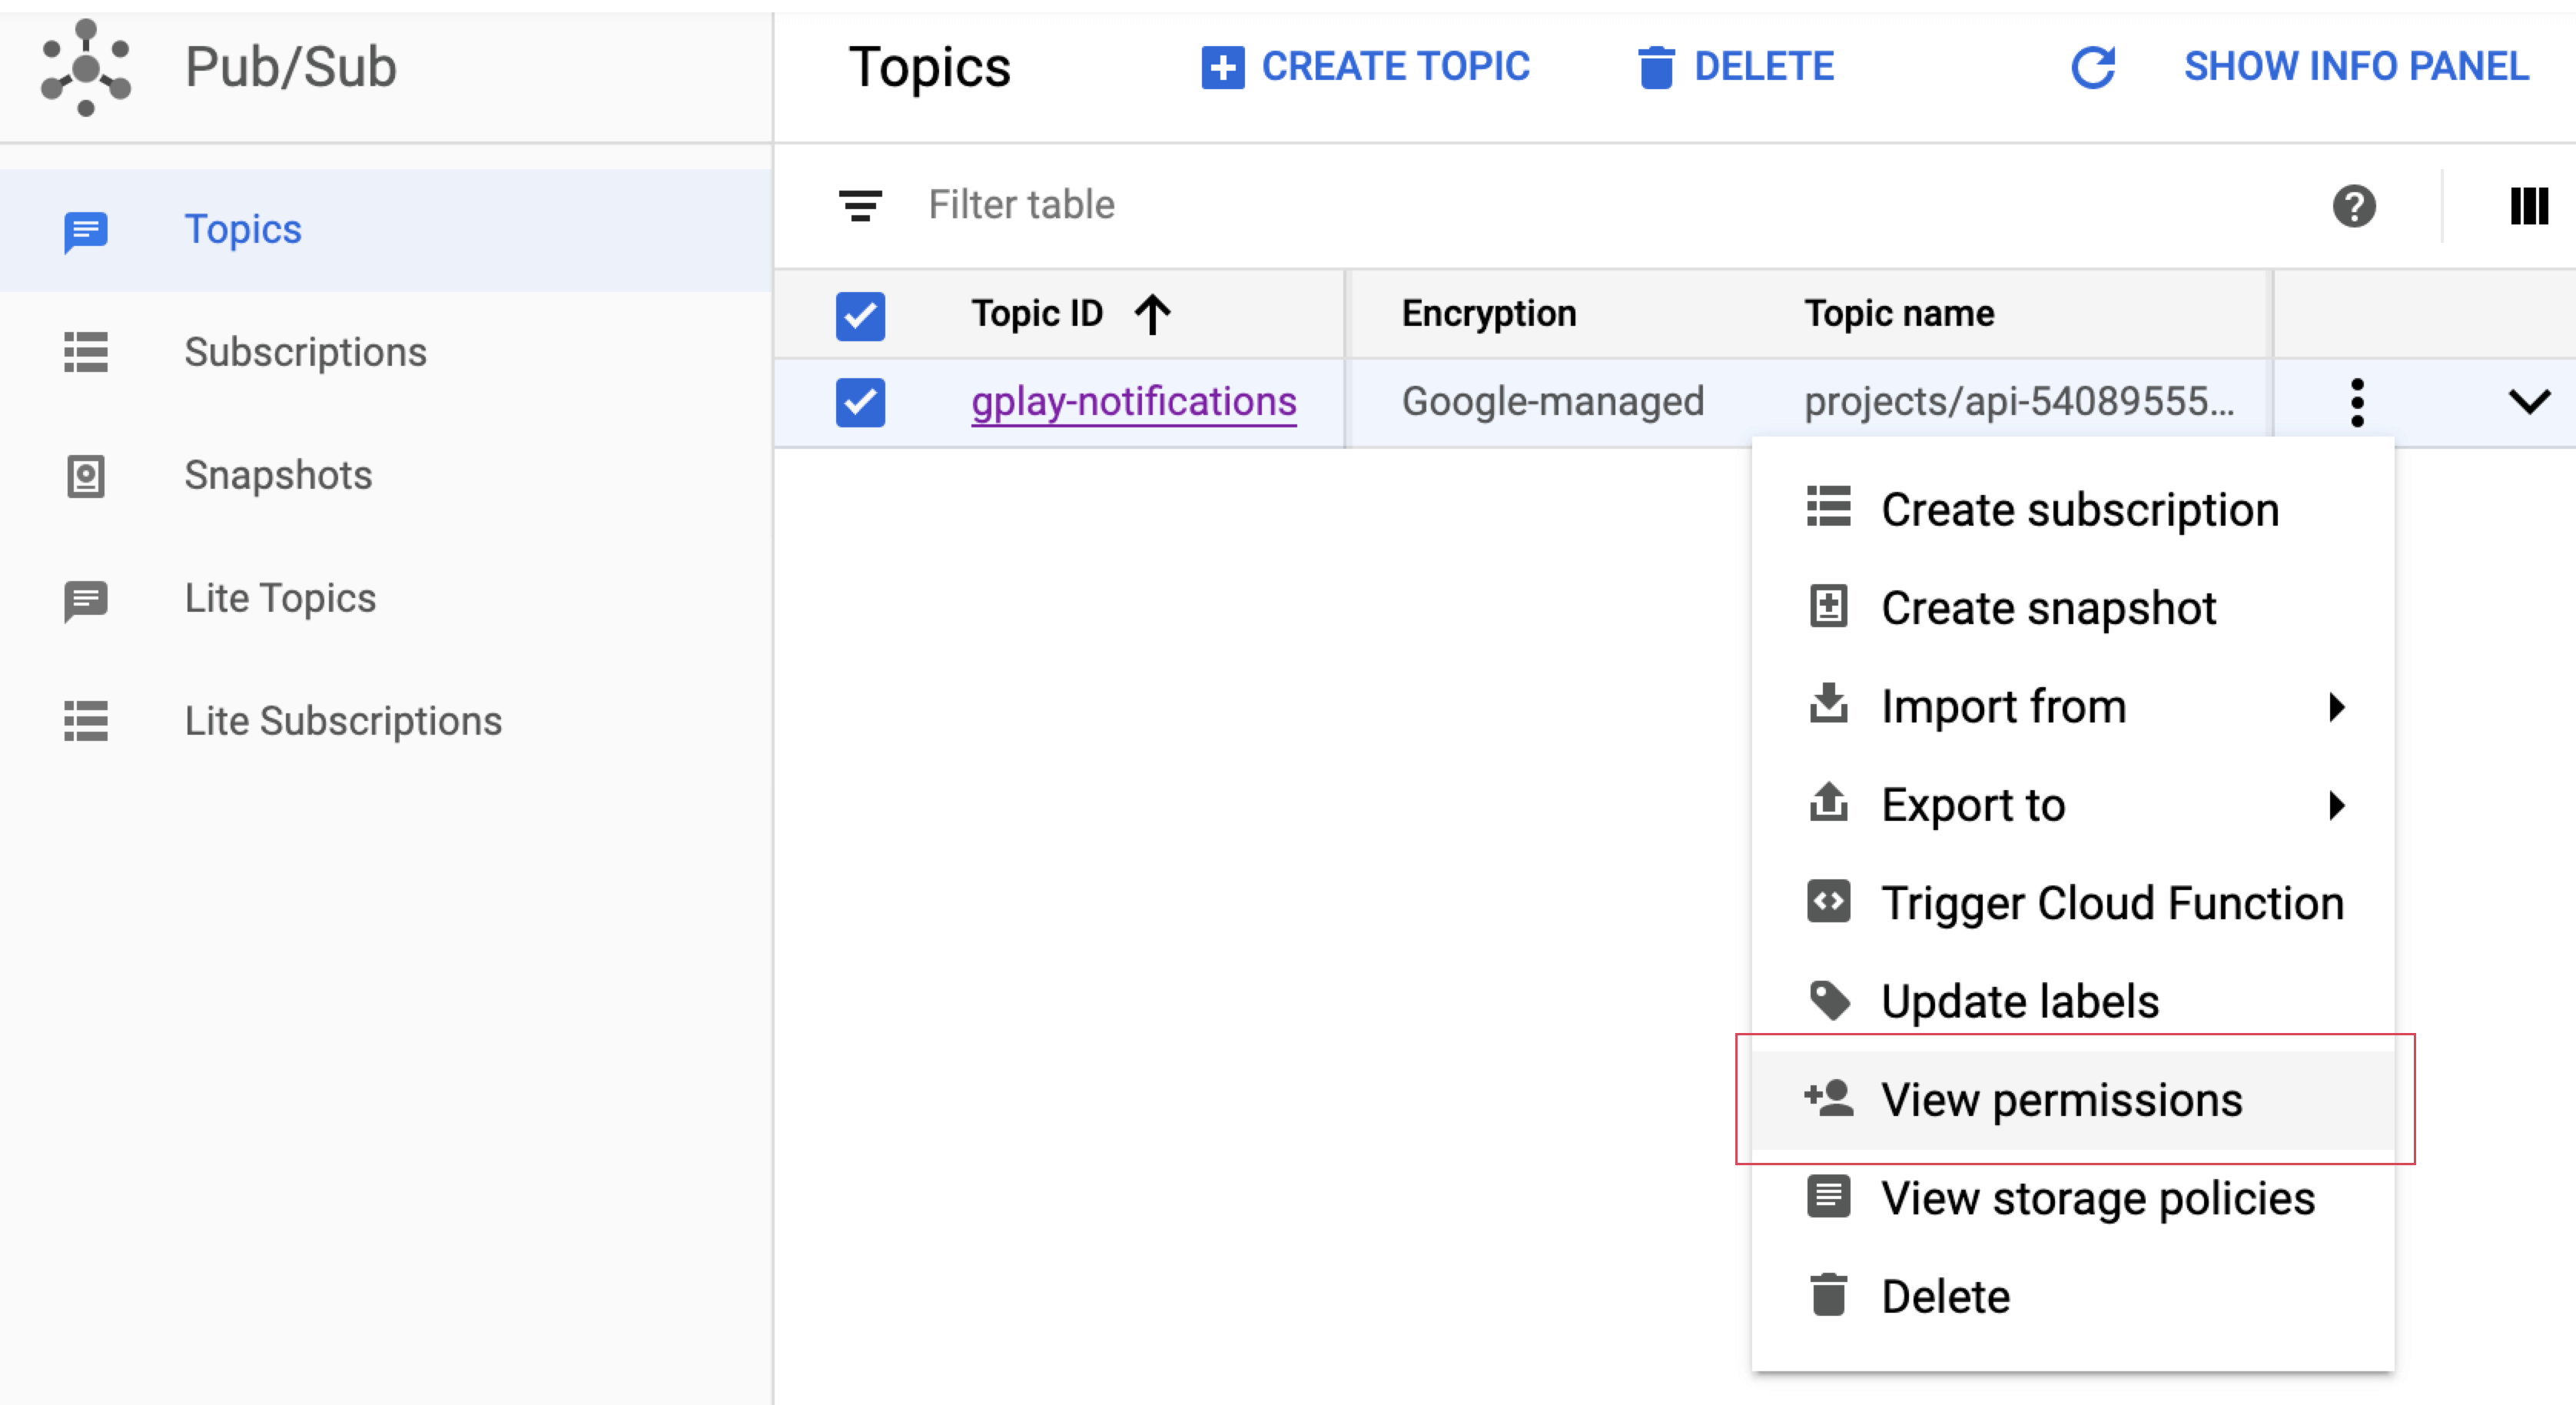
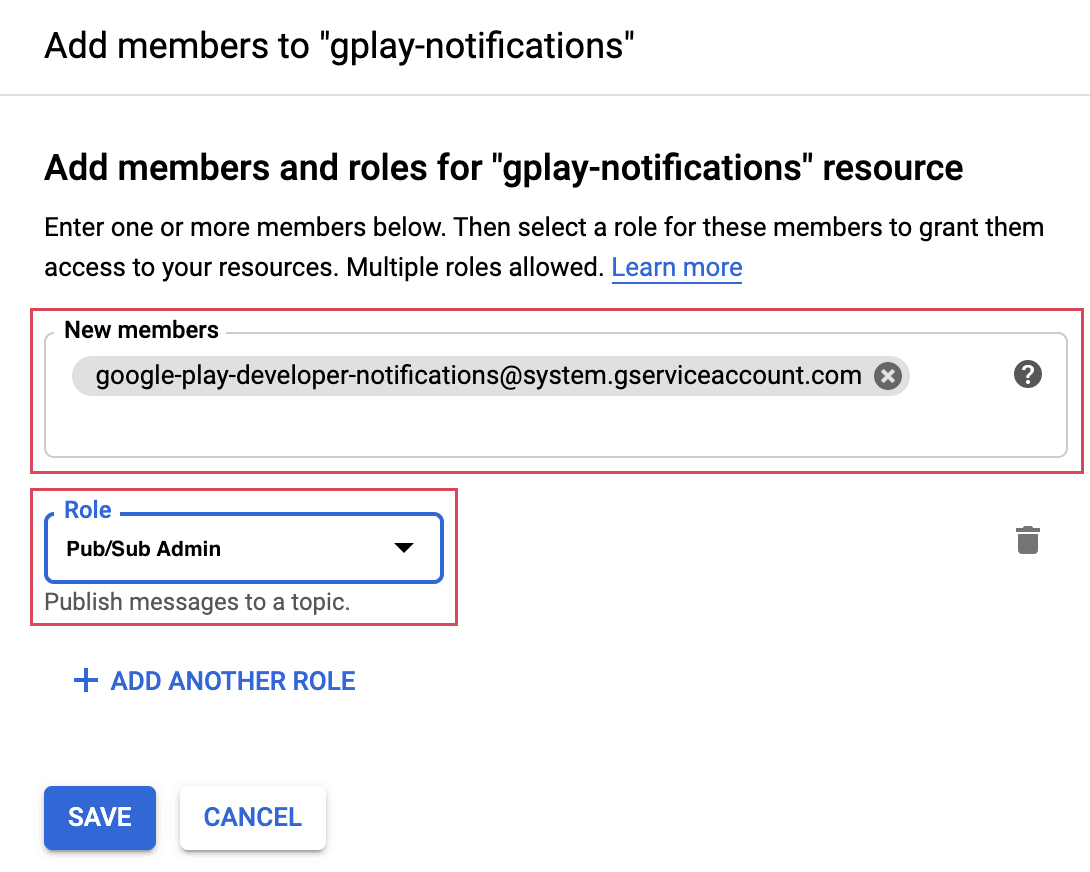
9. Click on ADD MEMBER
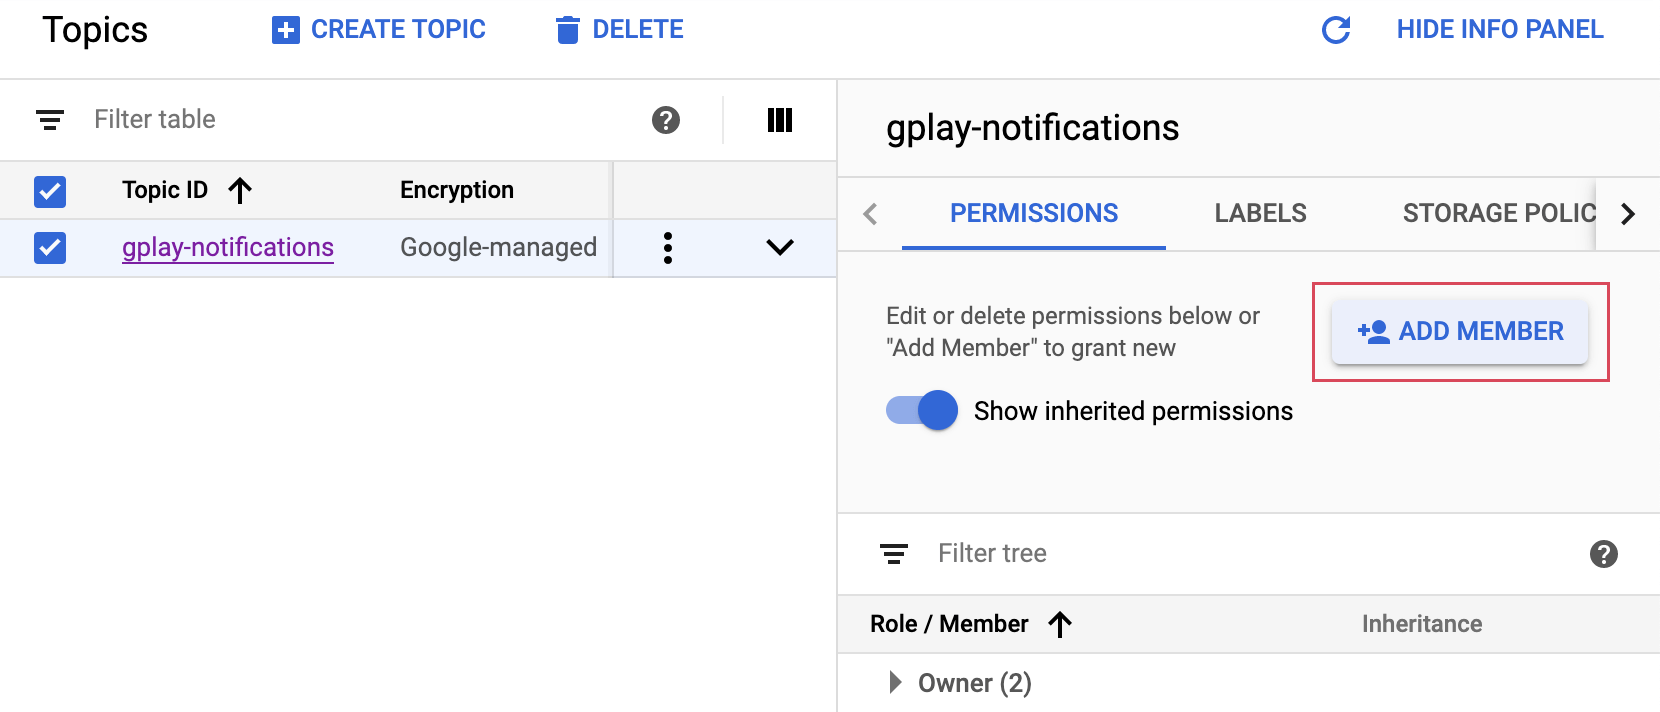
10. Add the service account [email protected] and grant it the role of Pub/Sub Admin
11. Open the Google Play Console, navigate to your app and go to Monetize > Monetization setup, scroll to the Real-time developer notifications section and enter your topic name
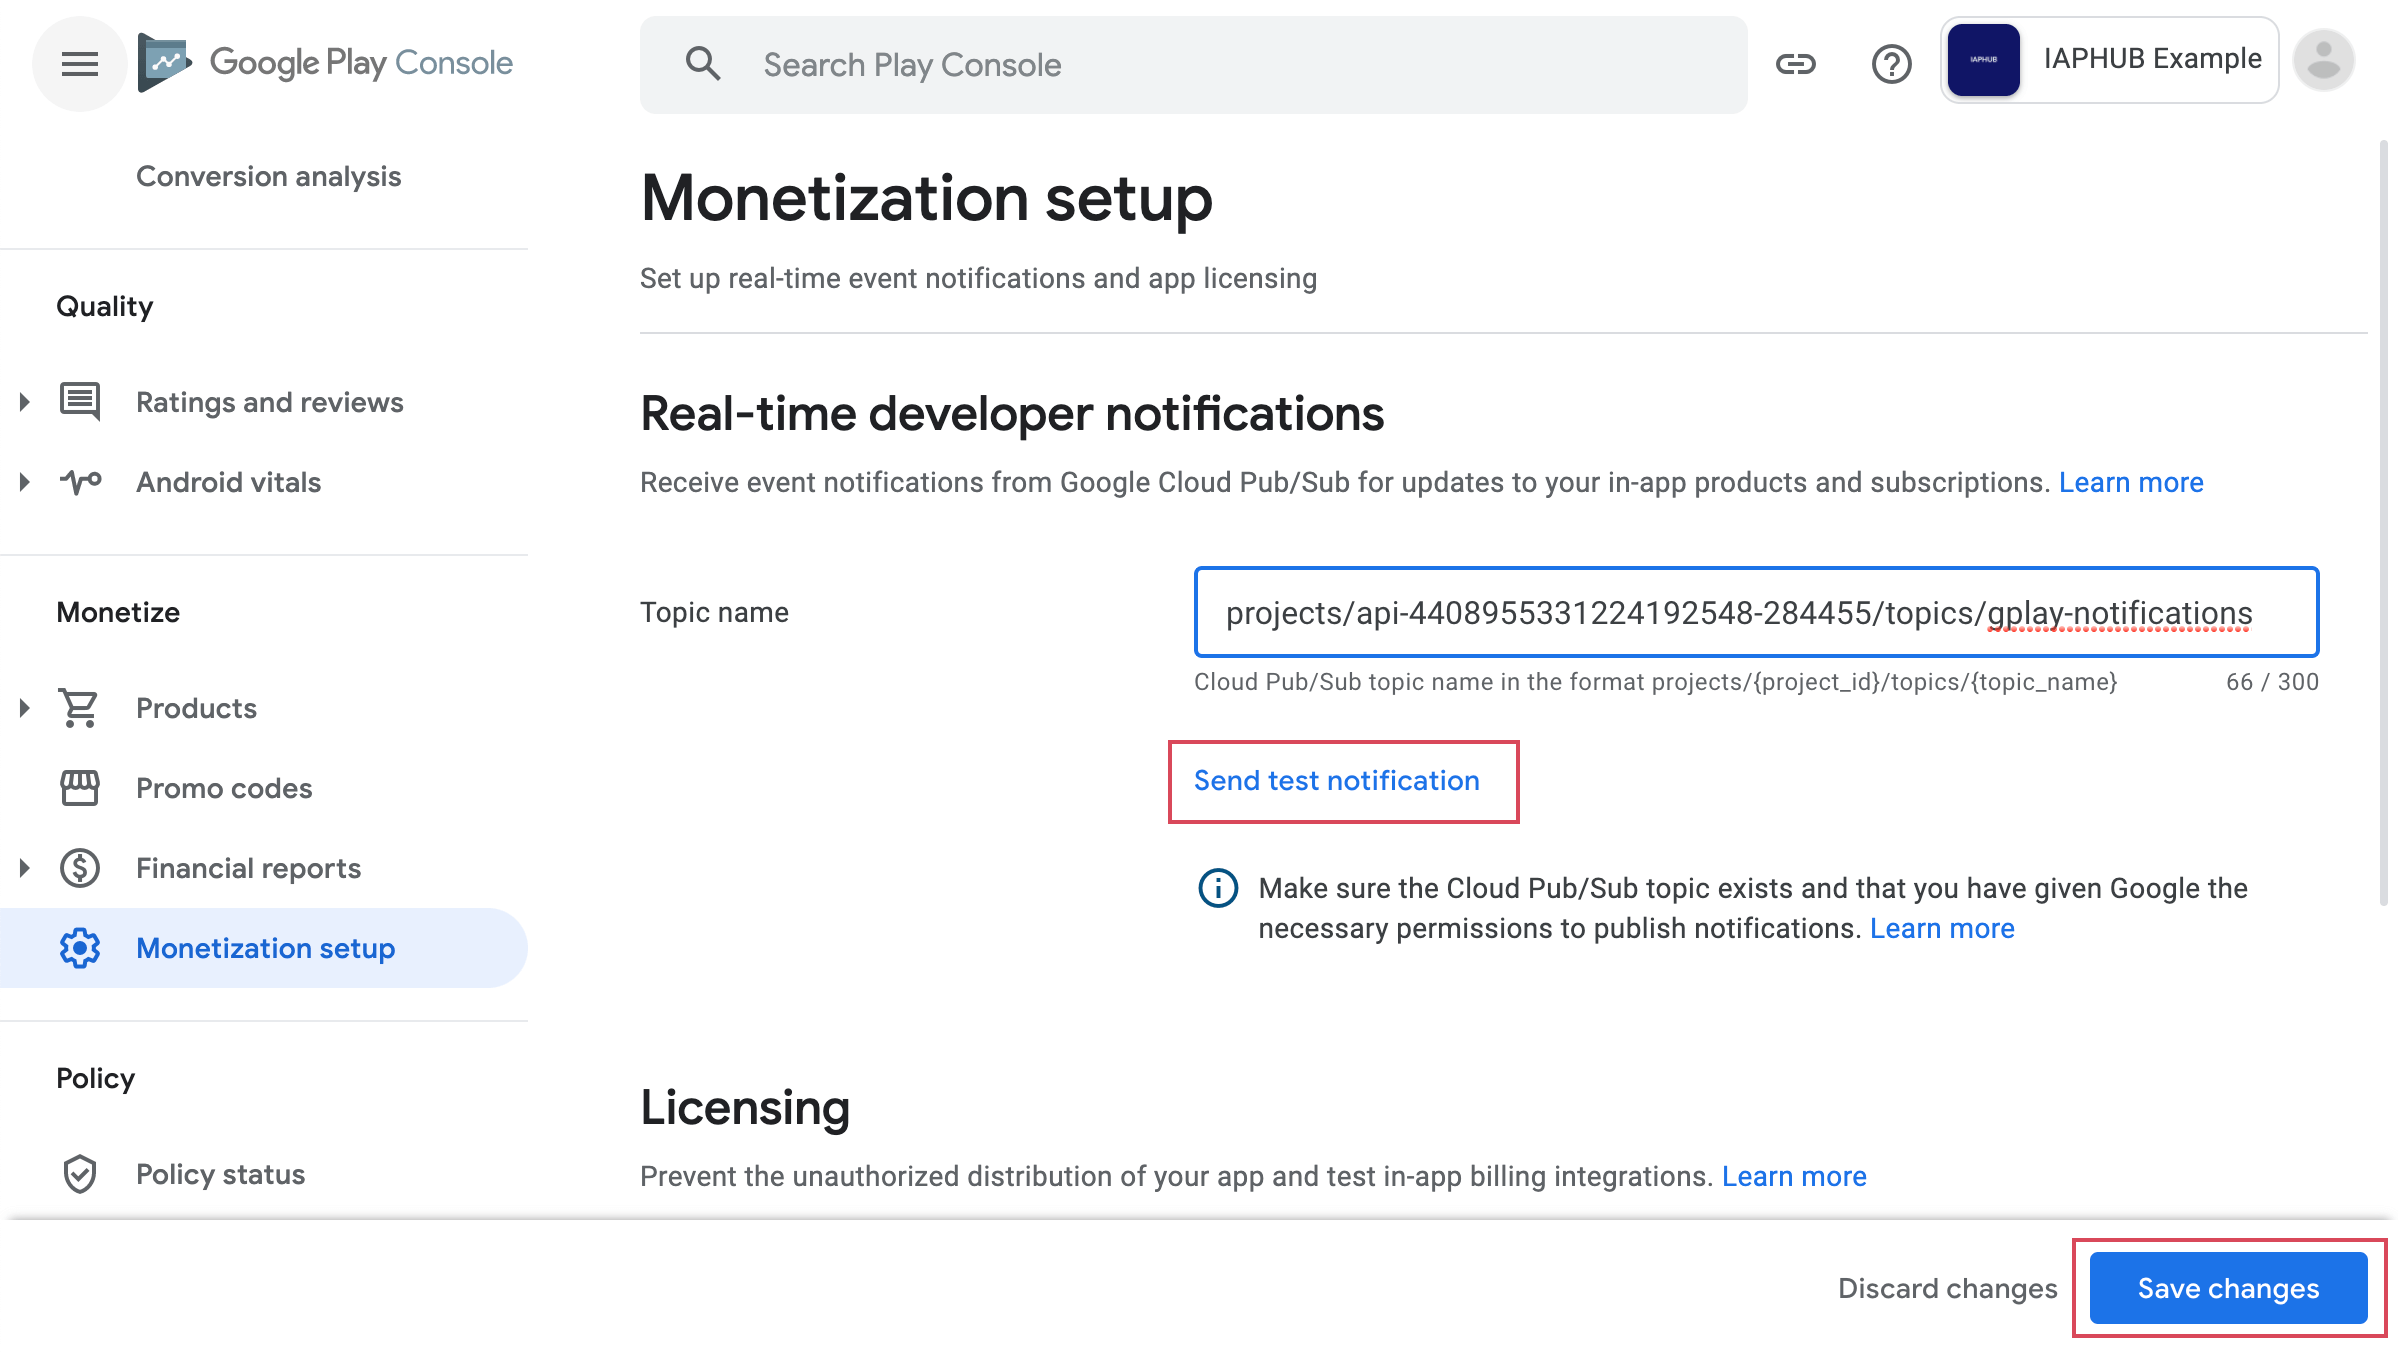
12. Save and send a test notification, if everything is configured correctly when refreshing the IAPHUB settings page you should see a Last received timestamp