Custom Paywall
If you're interested in selling consumables or require a custom user interface (UI) for subscription sales, you'll need to develop a custom paywall using components like the Buy Button, Restore Button, Manage Subscription Button, and Product Price.
In the example below, we'll demonstrate how to create a simple paywall for selling a subscription. However, feel free to customize the paywall according to your preferences or implement entirely different functionalities.
Buy Button
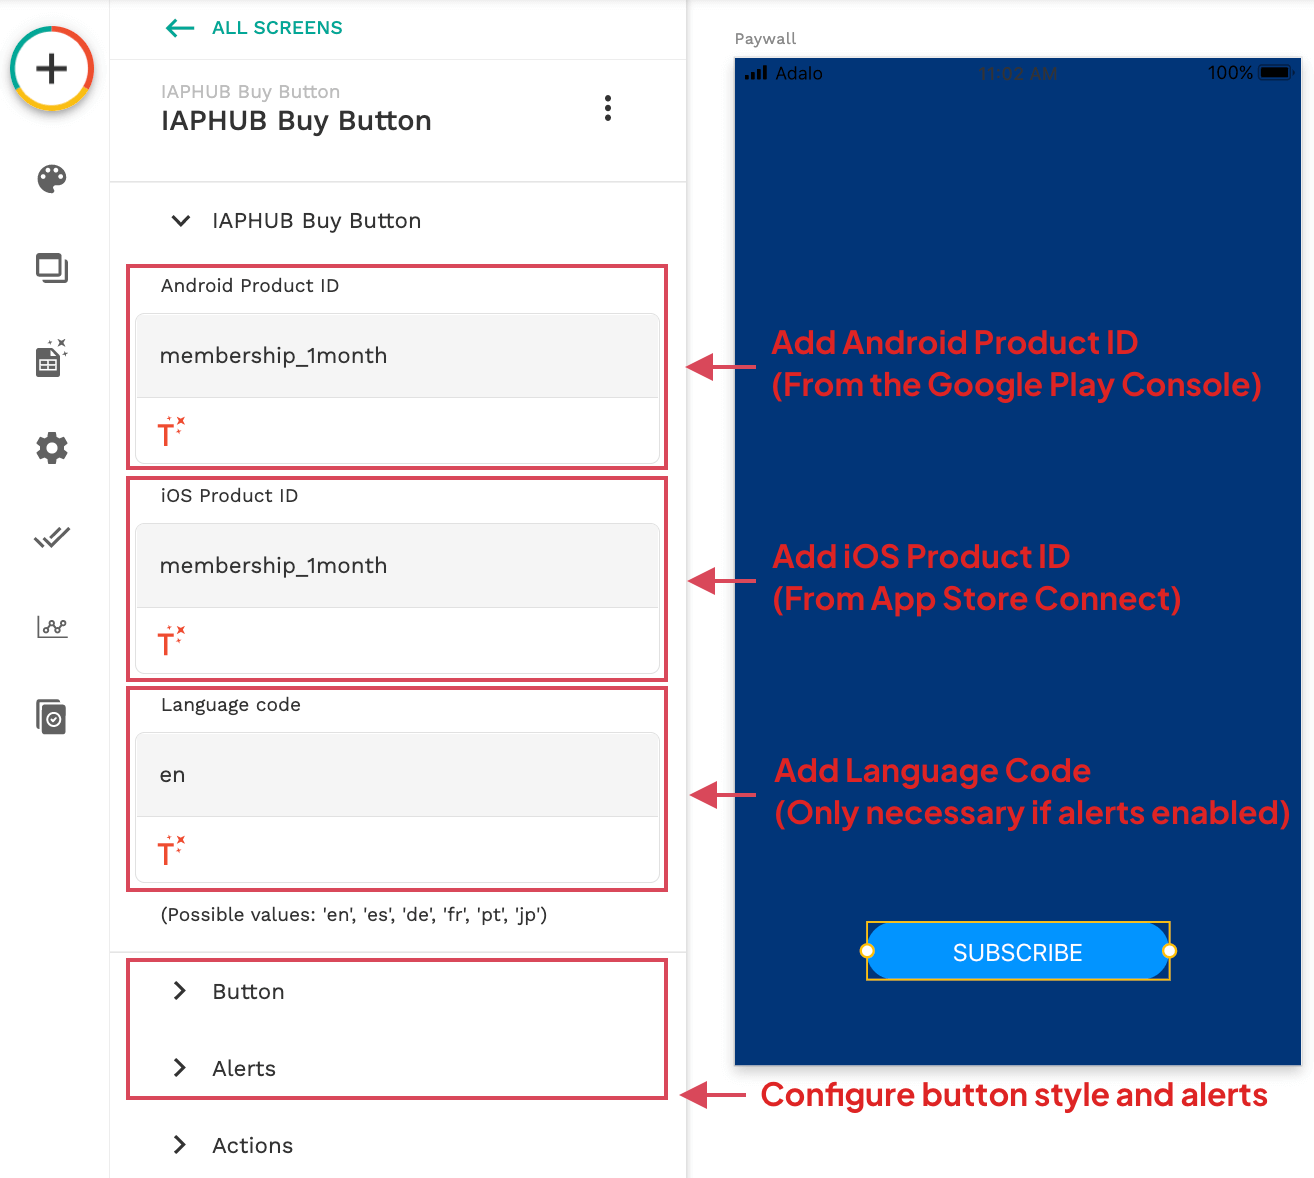
Insert the IAPHUB Buy Button component on your Paywall screen. The button is required to allow the user to purchase your product.
Add the Android Product ID (from the Google Play Console) and the iOS Product ID (from App Store Connect).
The Language code is only necessary if you've enabled the alerts, it'll display an alert message after the payment succeeds or fails (enabled by default). You can configure the Alerts and the Button style if needed.
You can configure two actions on the component:
- When the purchase is successful
- When the purchase fails
Adding an action when the purchase fails is optional if you've enabled the alert displaying an error.
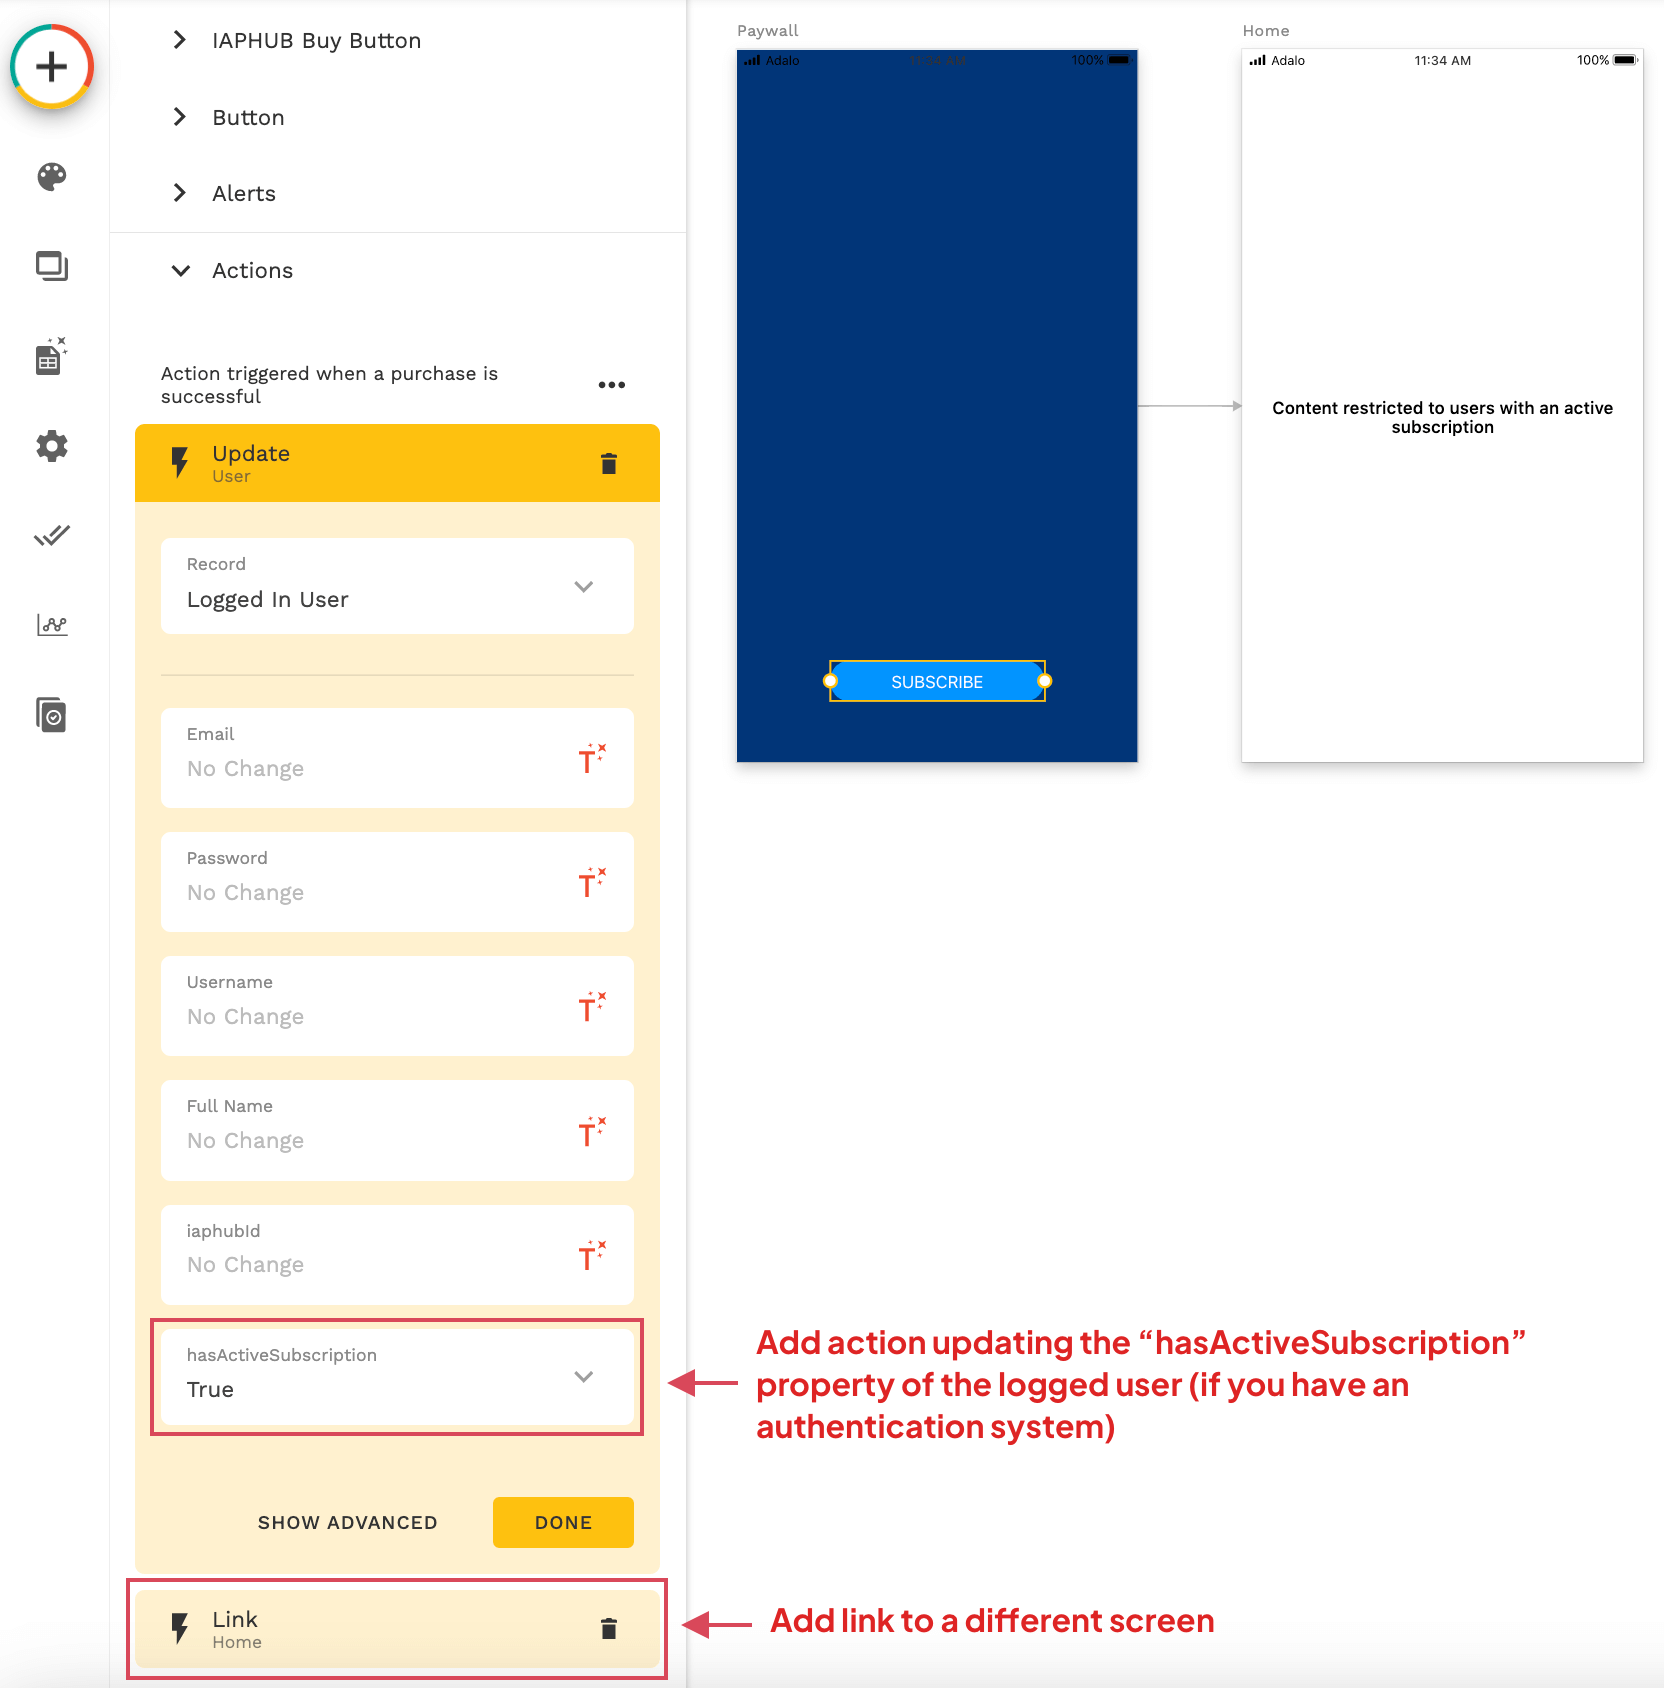
But adding an action when the purchase is successful is essential. For our example, we're going to redirect the user to a screen restricted to users with an active subscription.
If your app has an authentication system and you've added a property hasActiveSubscription for the logged user just like we did in our guide explaining how to set up the start component, you should also add an action updating the property to "true".
Restore Button
You must include a restore button somewhere on your app, usually on the paywall page.
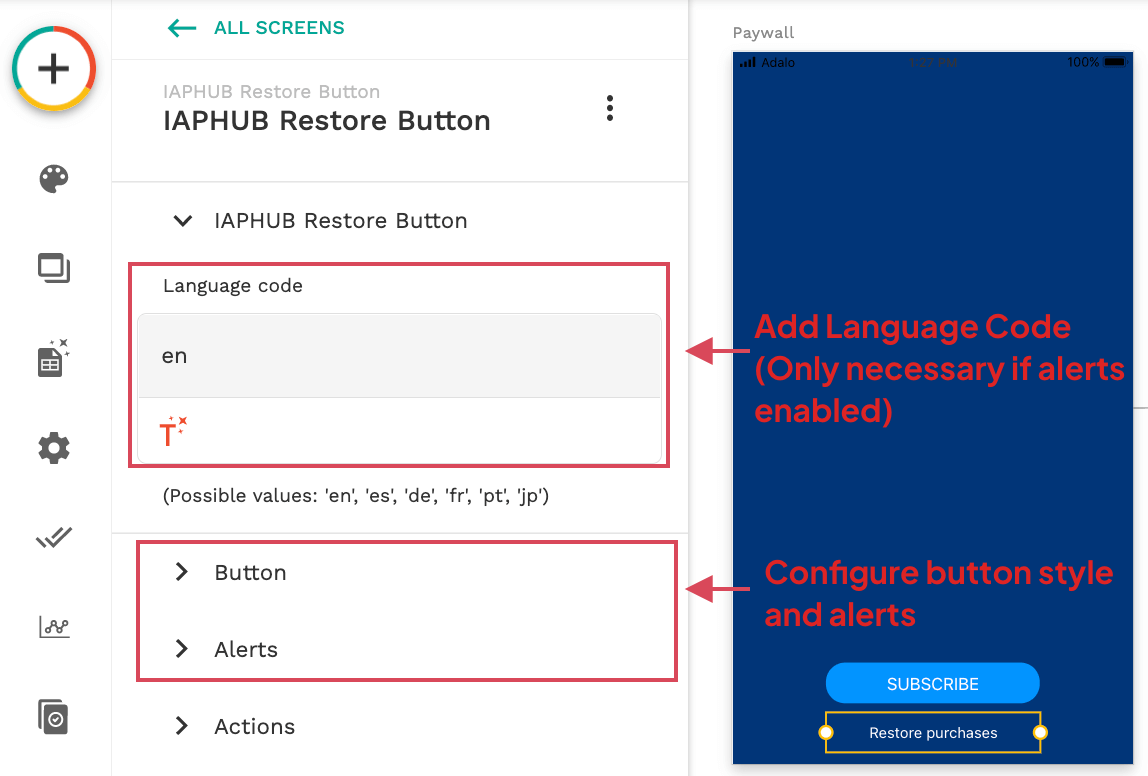
Insert the IAPHUB Restore Button component on your Paywall screen. This button will allow the user to restore their purchases in case he changed his device or something went wrong.
You'll need to provide the Language code that will be necessary to display the alerts. You can configure the Alerts and the Button style if needed.
You can configure four actions on the component:
- When the restore is successful
- When the restore is empty (restore successful but no transactions found)
- When the restore fails
- When a transaction is restored (can be triggered multiple times)
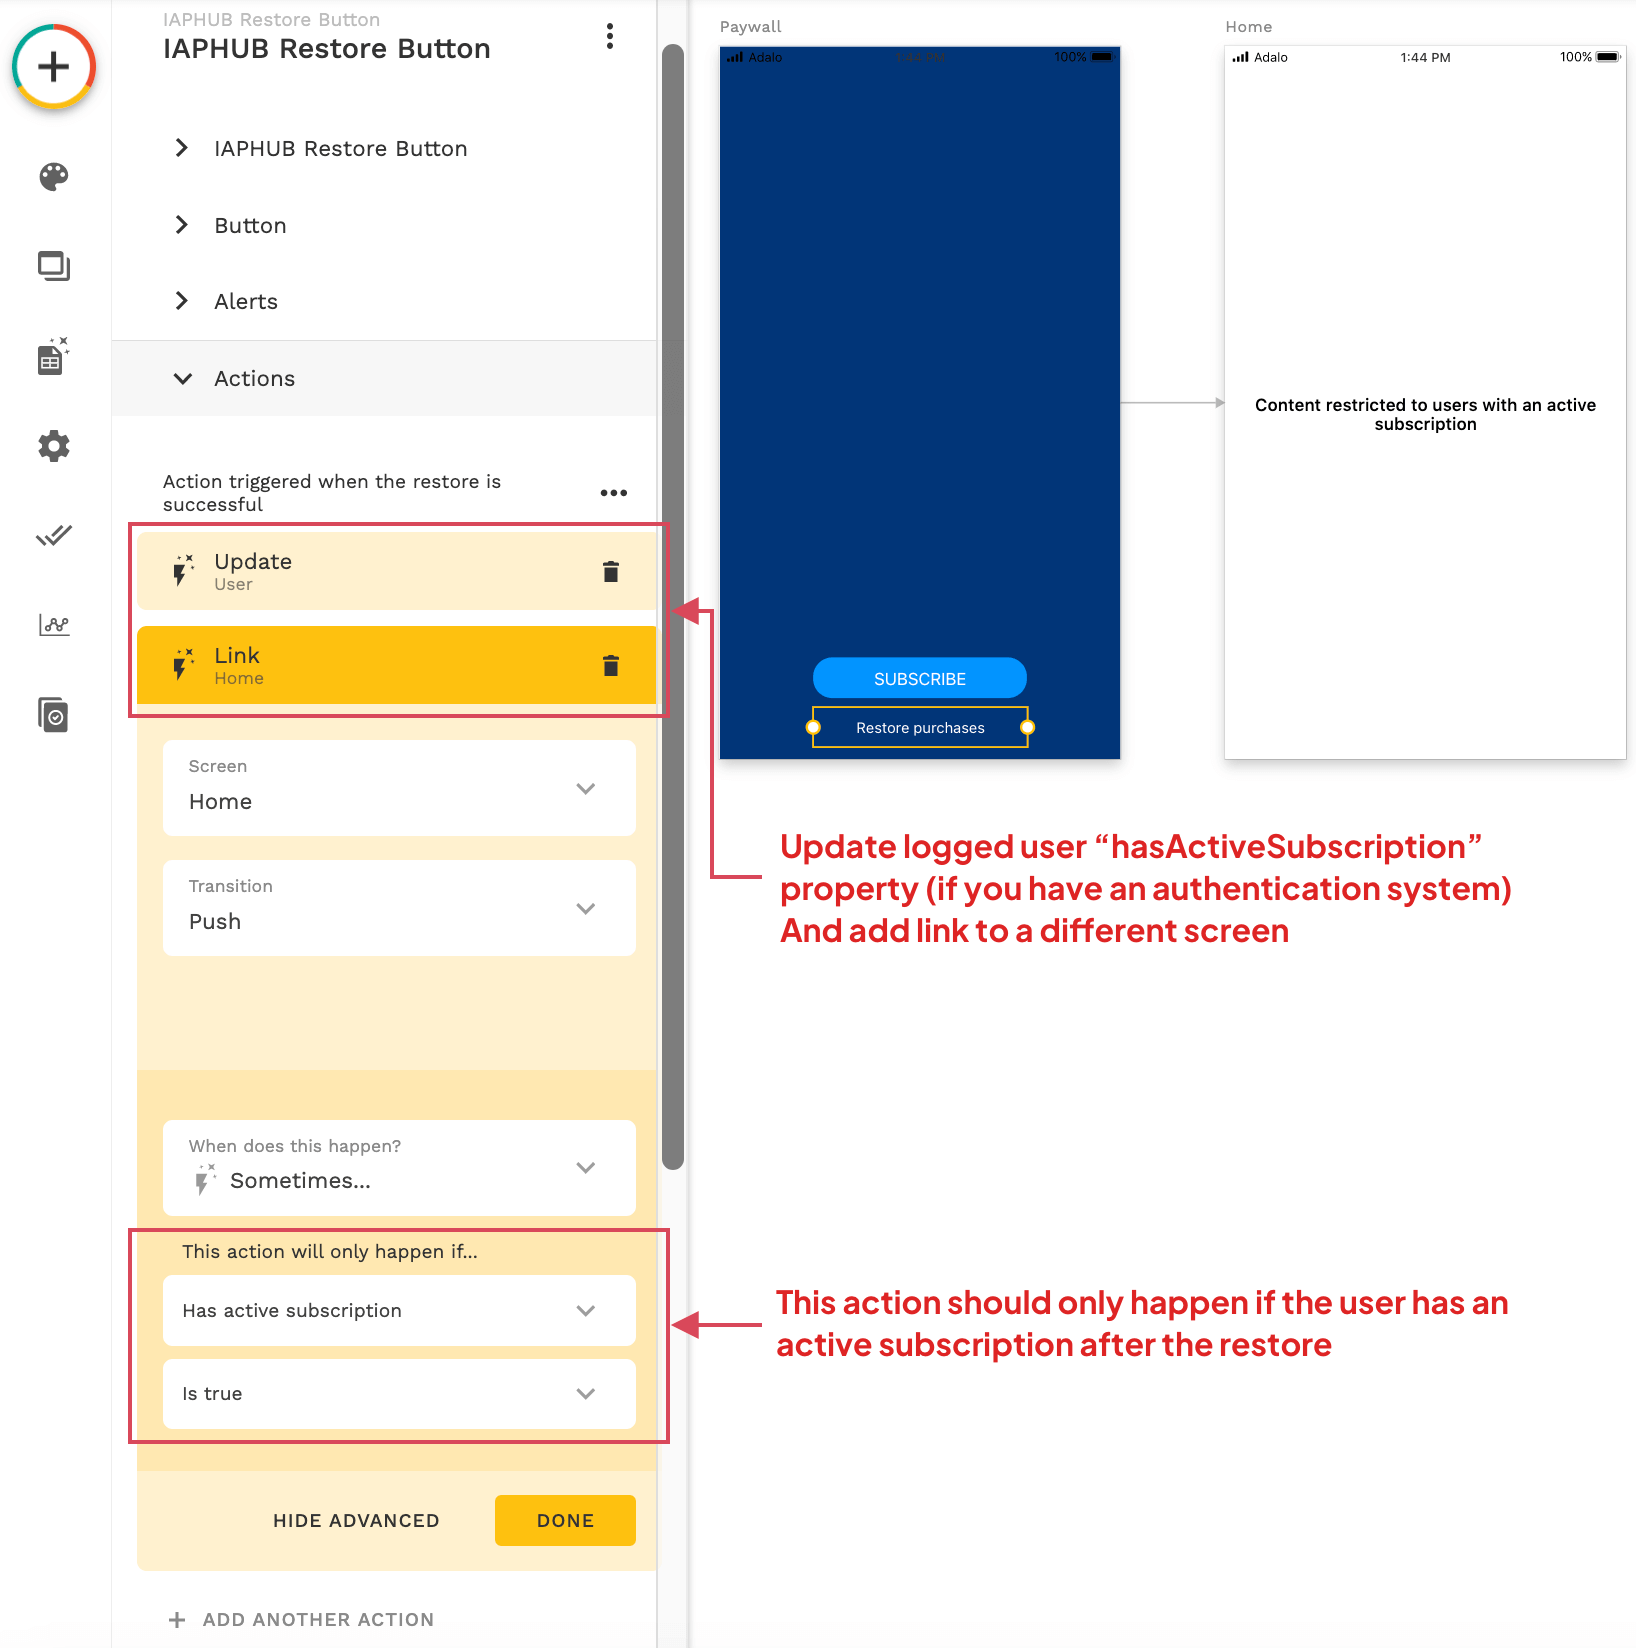
For this example, we need to handle the case when a user needs to restore their subscription.
We're going to add the same actions as when the user purchases succeed. We're also going to use the property "Has active subscription" returned by the action in order to make sure the user has an active subscription after the restore.
Product Price
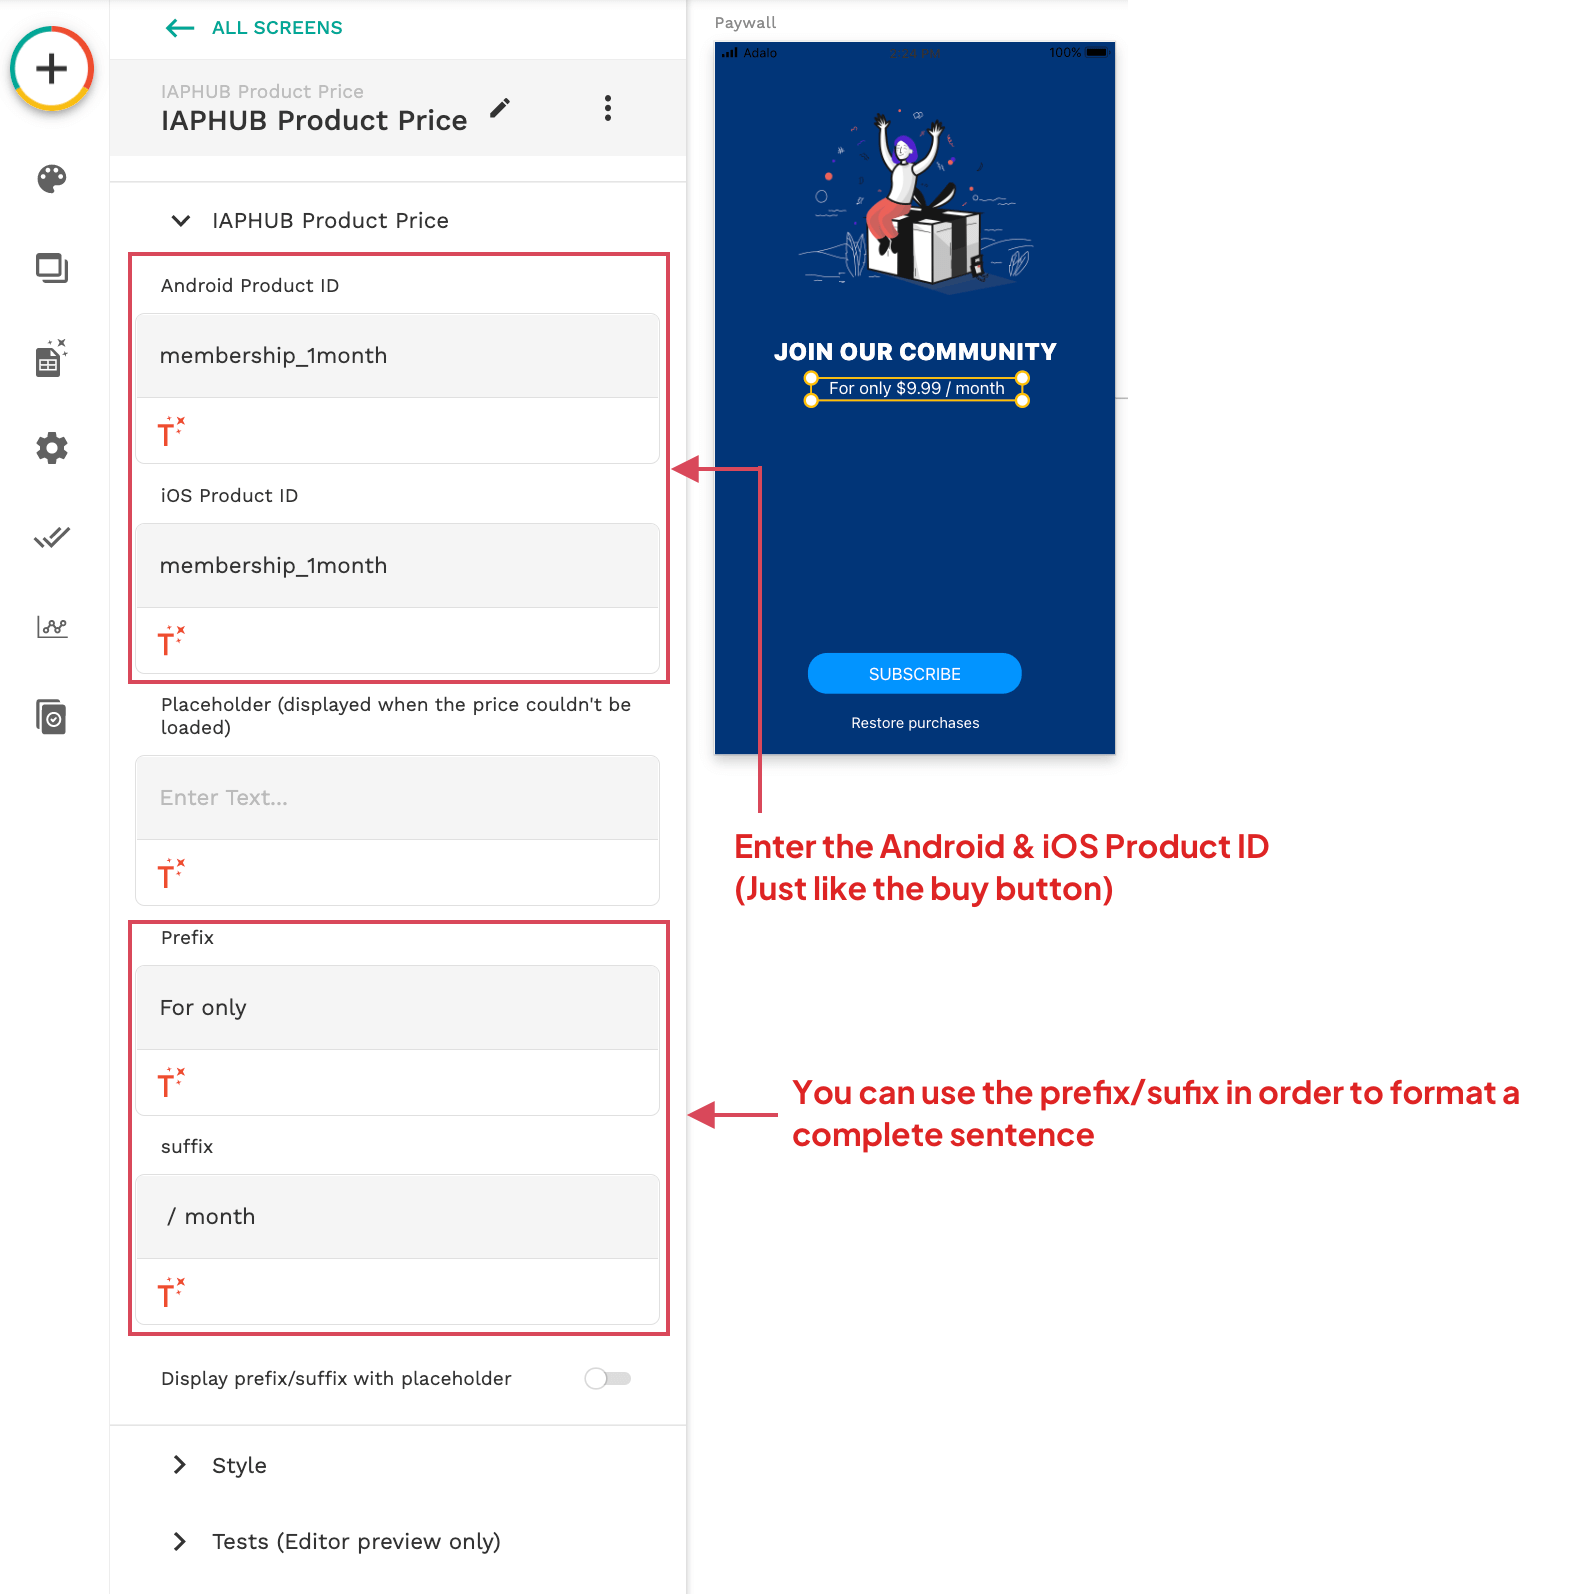
We're now going to display the price of the subscription. In order to do so insert the IAPHUB Product Price component.
We're also going to make the screen a little nicer with an image and a title!
Add the Android Product ID (from the Google Play Console) and the iOS Product ID (from App Store Connect), just like the buy button.
You can also add a prefix and suffix in order to format a complete sentence.
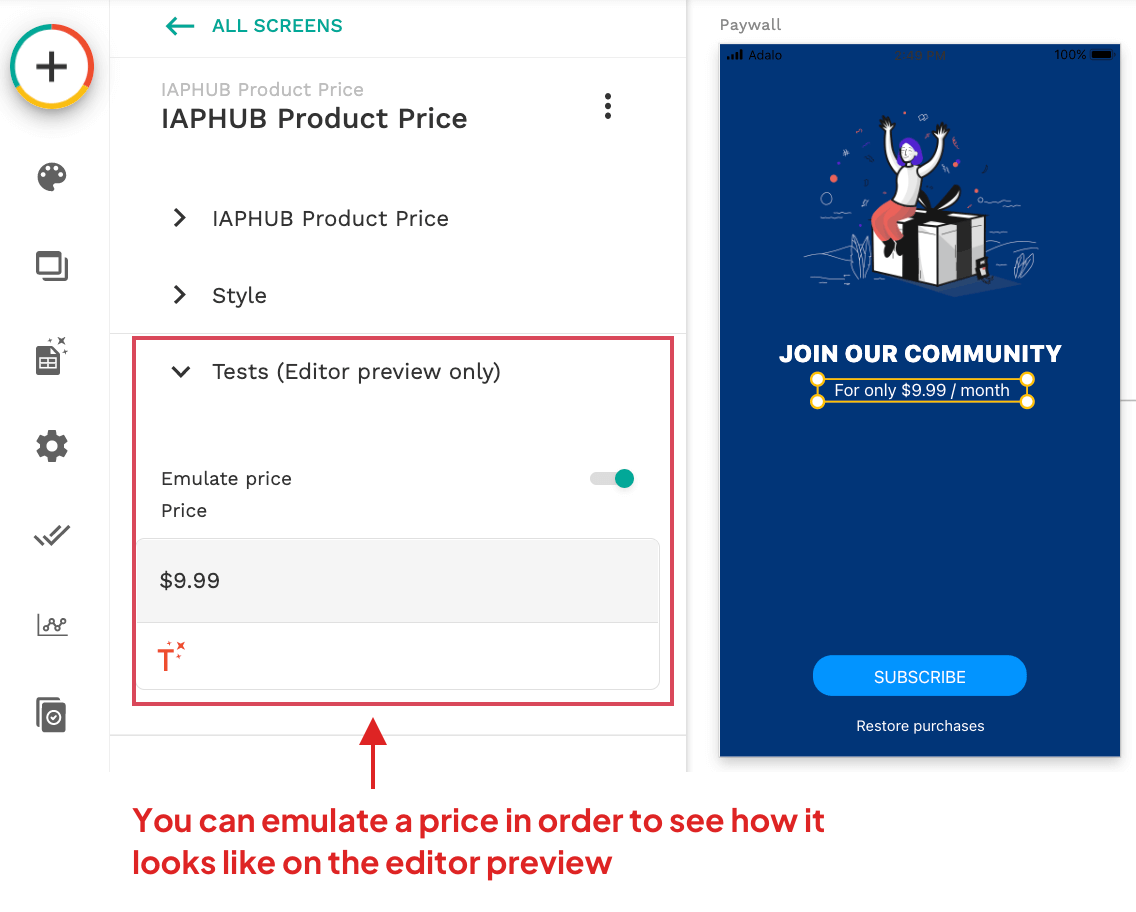
The price can't be loaded on the editor preview (it'll only load on the app).
But an option is available to emulate a price in order to preview how it will look like.
Manage subscription (optional)
The IAPHUB Manage subscription component is available if you would like to redirect the user to the GooglePlay/AppStore page to manage the subscriptions.
Next step
After that just make sure the paywall is rendered correctly on the Adalo web preview and that's it, congrats!
The next step is to create the products you would like to sell, you can find the instructions here.