Plug&Play Paywall
The IAPHUB Paywall component will display all the UI necessary to sell your auto-renewable subscriptions.
The component supports one or multiple subscriptions belonging to the same subscription group.
It is extremely easy to set up and will load the subscriptions directly from IAPHUB (allowing you to configure your subscriptions directly from the IAPHUB dashboard).
Insert IAPHUB Paywall
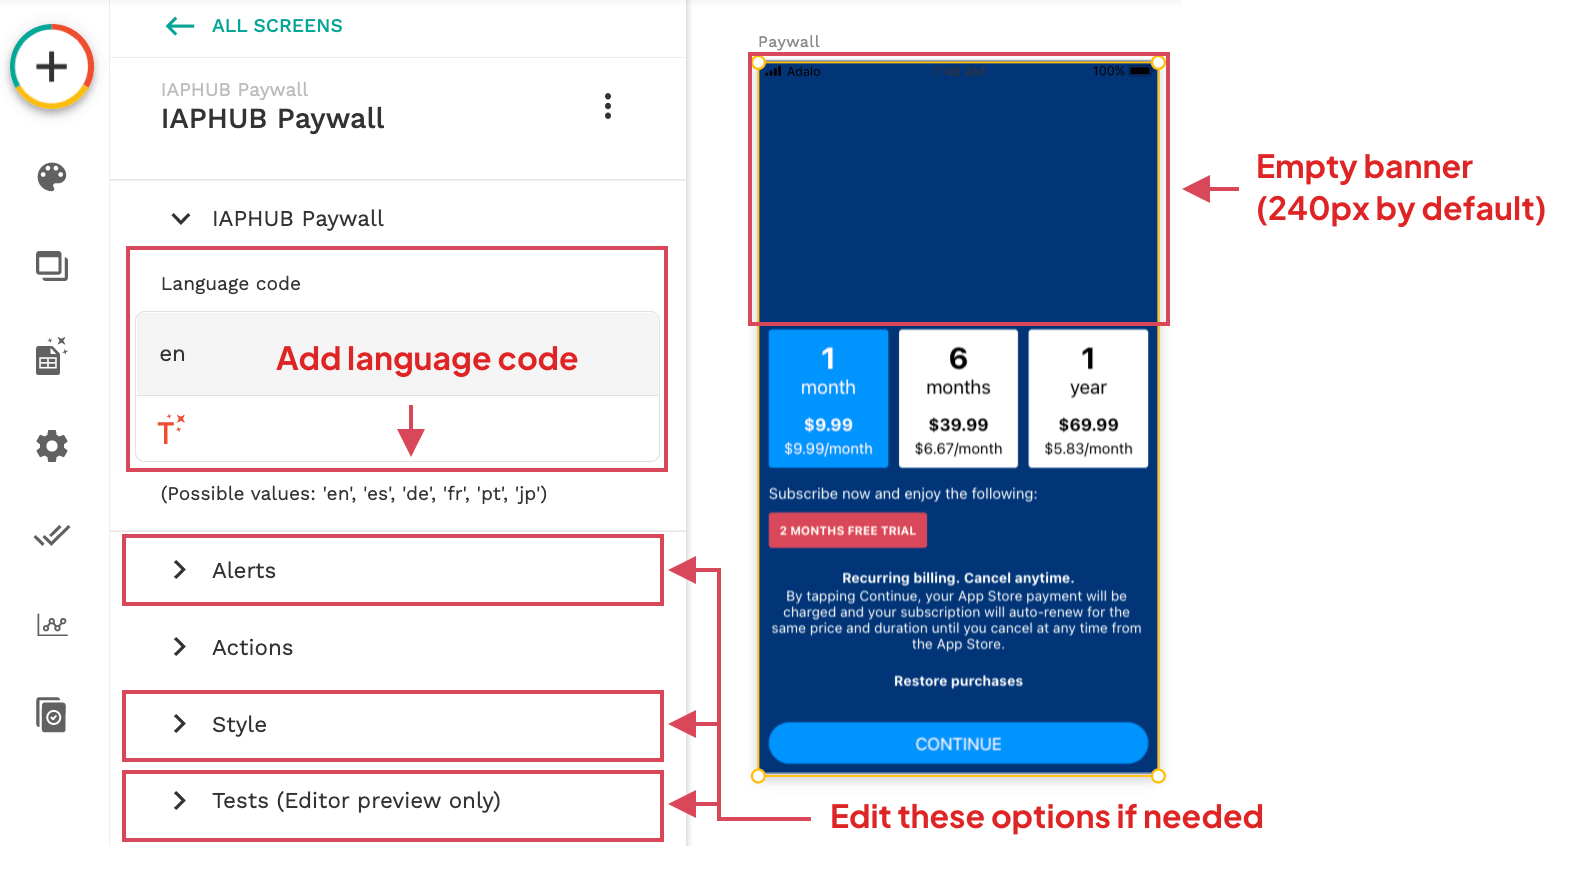
Before inserting the Paywall component, it's essential to customize the background color of your Paywall screen. While the default IAPHUB Paywall works well with various backgrounds, it may not render optimally on a white background. If you prefer a white background, you'll need to adjust the background color of the paywall components in the Style menu accordingly.
Once the background color is configured, you can proceed to insert the Paywall component. Simply provide the component with your language code. It's crucial to ensure that the component spans the entire screen's height and width for seamless integration. By default, the component includes an empty banner with a height of 240px. This banner offers customization options such as adding a title, description about your subscription, or an image. Adjustments to the banner height can be made in the Style menu to suit your preferences.
Please note that the displayed subscriptions (1 month, 6 months, 1 year) are for demonstration purposes only and are not real. To test your paywall with actual subscriptions, you'll need to publish your iOS app on TestFlight and your Android app on Google Play internal testing. For more information, refer to the sandbox testing documentation.
Additionally, you have the flexibility to experiment with various configurations in the Tests section to preview how your paywall will appear with different settings.
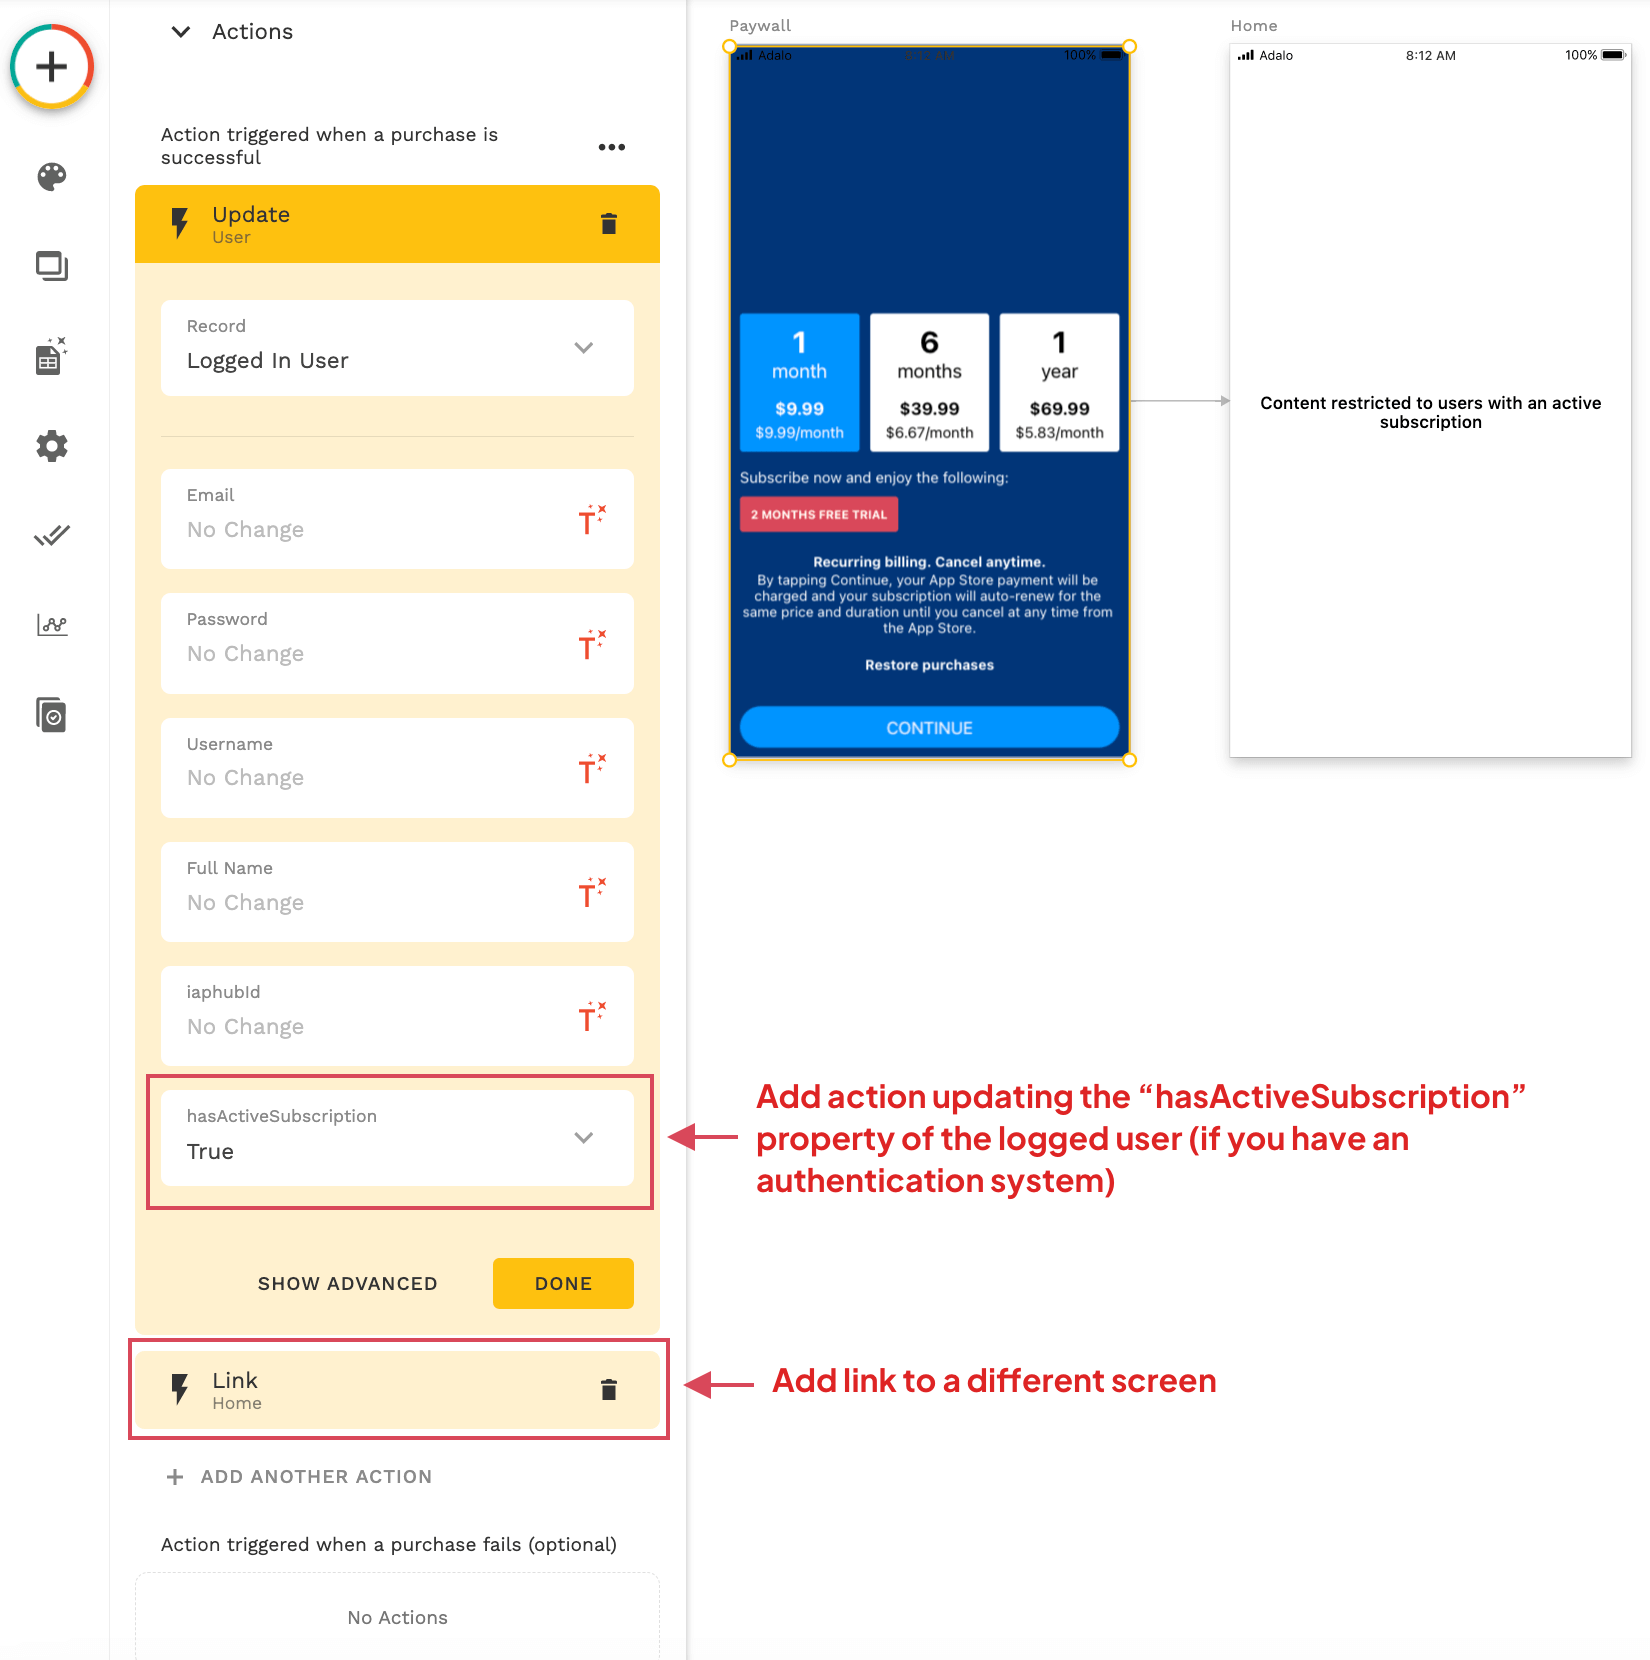
Configure actions
You can configure six actions on the component:
- When the purchase is successful
- When the purchase fails
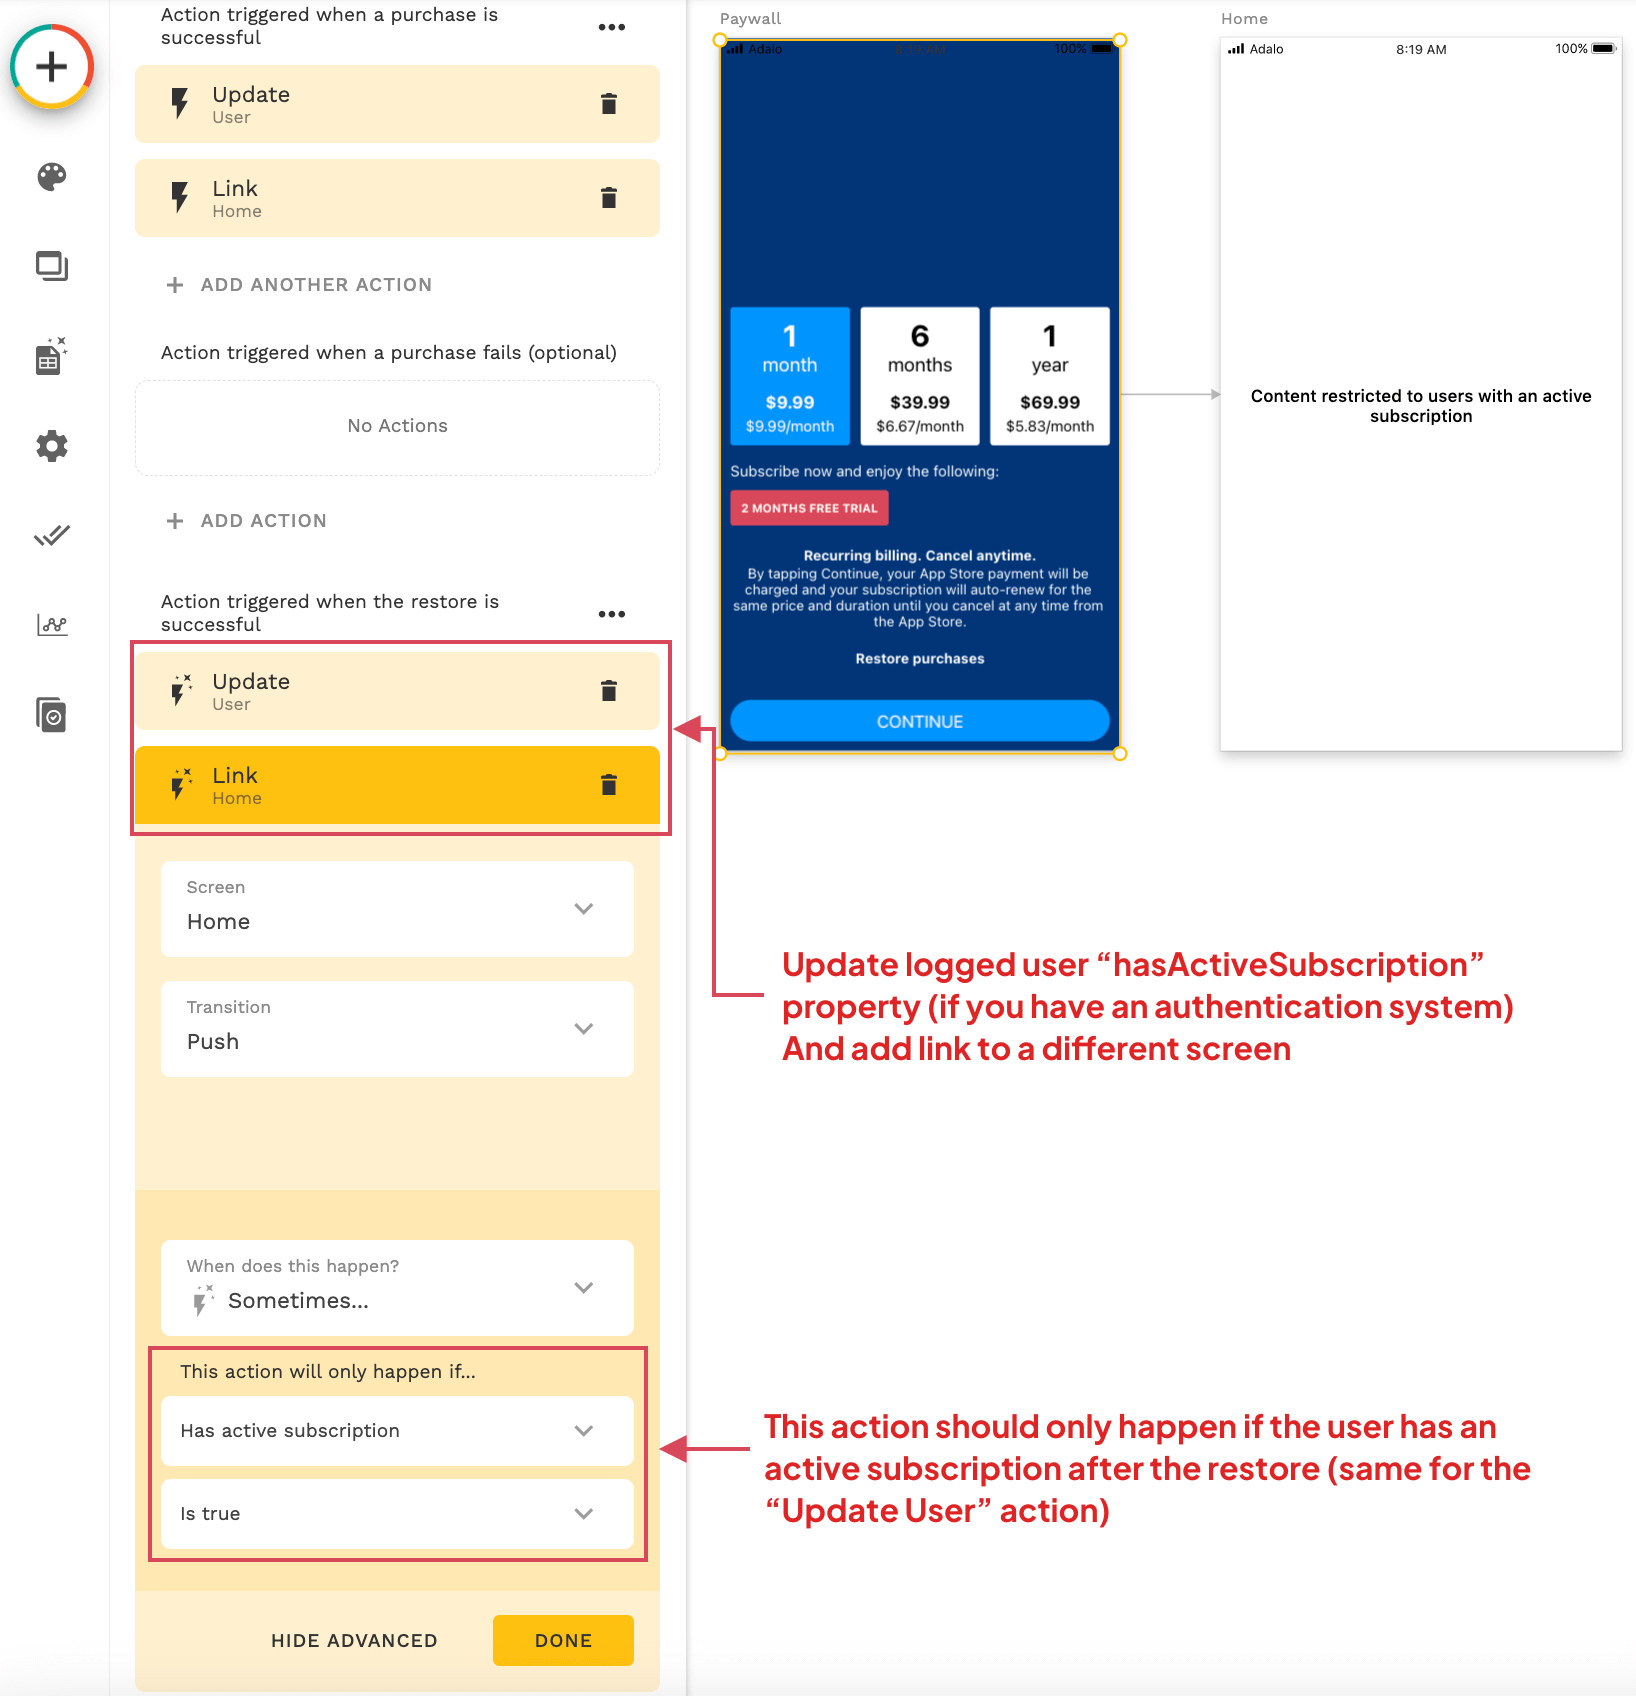
- When the restore is successful
- When the restore is empty (restore successful but no transactions found)
- When the restore fails
- When a transaction is restored (can be triggered multiple times)
In this example, we only need to add actions for when the purchase is successful and when the restore is successful. All other actions (except when a transaction is restored) will display an alert. You can disable an alert if you need to customize it. The action triggered when a transaction is restored is only necessary if you need to save your transactions in a database.
For our example, we'll redirect the user to a screen restricted to users with an active subscription.
If your app has an authentication system and you've added a property hasActiveSubscription for the logged-in user, as explained in our guide, you should also add an action to update the property to "true".
When the restore is successful, ensure to replicate the process similarly. Utilize the "Has active subscription" property returned by the action to verify that the user maintains an active subscription post-restoration.
Next step
After ensuring that the paywall is correctly rendered on the Adalo web preview, congratulations! You're almost there.
The next step is to create the products you would like to sell. Detailed instructions for this step can be found here.